Best Diff Breathers for Jeep JK: Extended Vent Kit & Water Fording Protection
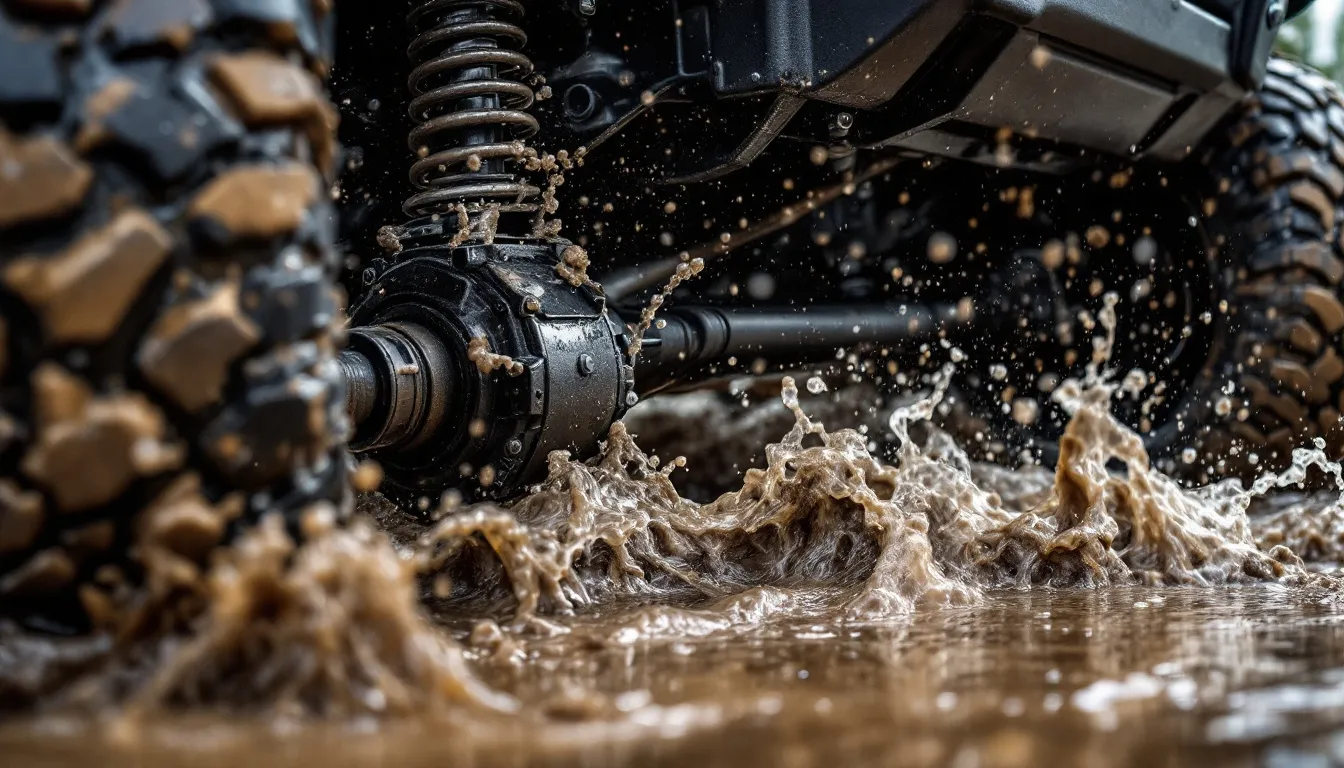
Extended differential breather kits relocate your JK’s diff and transfer case vent lines from frame rail height (19-24 inches) to the engine bay (30+ inches), preventing water from being sucked into axles during water crossings. Kits with check valves ($40-$70) offer the best protection by allowing air out while blocking water backflow, even if submerged. All JKs crossing water deeper than 12 inches should install extended breathers on front diff, rear diff, and transfer case to prevent gear oil contamination and bearing failure.
You need three breathers minimum: one for your Dana 30 or Dana 44 front axle, one for your Dana 44 rear, and one for your NV241 transfer case. The factory vents terminate at frame rail level — right where they’ll get submerged if you’re crossing anything deeper than a puddle. When those hot diffs hit cold water, they create a vacuum that sucks water straight past the breather. What follows is milky gear oil, destroyed bearings, and repair bills exceeding $2,000 per axle.
Extended breathers with check valves provide mechanical protection against this failure mode. They’re the first line of defence against turning a water crossing into an expensive recovery operation. Installation takes 1-2 hours with basic tools. The investment protects thousands of dollars in differential and transfer case internals.
Why Your JK’s Factory Diff Breathers Aren’t Enough for Water Crossings
Your Wrangler’s differentials and transfer case generate heat during normal driving. That heat expands the air inside the sealed housings, creating pressure. Without a way to vent that pressure, you’d blow axle seals and leak gear oil all over your garage floor. That’s what breathers do — they’re pressure relief valves that allow heated air to escape.
Jeep installed those breathers at the top of each axle housing, with short vent lines that terminate somewhere around the frame rail. On a stock JK, that puts them roughly 19-24 inches above ground level. Jeep’s official water fording depth rating is 19 inches for exactly this reason — go deeper and you’re submerging critical vent points. Whether you’re running factory Dana axles or have performed a regear with fresh ring and pinion sets, the breather positioning presents the same vulnerability.
Here’s where physics gets expensive. Drive your Jeep hard enough to heat the diff fluid to 90°C, then roll into a cold stream crossing. The differential housing cools rapidly. The air inside contracts. You’ve just created a vacuum inside a sealed housing with an open vent line that’s now underwater. Water takes the path of least resistance — straight through the breather and into your axle.
The result is gear oil contaminated with water. It turns into a milky chocolate-coloured emulsion that destroys bearings in hours, not weeks. Pull your diff cover a day after a water crossing and you’ll see the damage: pitted bearing races, scored pinion teeth, and metal shavings suspended in what used to be 75W-90 synthetic.
A Dana 44 axle rebuild runs $2,000-3,000 depending on what needs replacing. An extended breather kit costs $40-70. The maths aren’t complicated.
Extended diff breathers solve the problem by relocating the vent point 30+ inches higher — typically to the engine bay, air box, or behind the grille. Even if your axles are fully submerged during a crossing, the vent lines terminate above water level. No vacuum. No water ingestion. No catastrophic bearing failure three weeks later when you’re wondering why your rear diff sounds like a cement mixer. The decision becomes more critical if you’re comparing JK vs JL models, as newer platforms may have different cooling characteristics during water crossings.
How Differential Breathers Work (And Why They Fail)
Think of your differential as a sealed container of gear oil with moving parts inside generating friction. Drive for an hour on the highway and that oil heats up significantly. The Dana 30 front diff holds roughly 2.7 quarts of fluid. The Dana 44 rear holds about 2.4 quarts. As that fluid heats from 40°C to 90°C, the air trapped above it expands.
Without a breather, that expanding air has nowhere to go. Pressure builds inside the housing until something gives — usually an axle seal. You’ll see gear oil weeping from the pinion seal or around the axle shafts. Breathers prevent this by venting excess pressure to atmosphere through a small fitting at the top of the housing.
The factory breather is a simple one-way system: a threaded fitting on the axle housing connects to a rubber hose that runs up to the frame rail. Air flows out when pressure builds. Problem solved for street driving.
Trail driving introduces the opposite problem. When you enter a water crossing with hot diffs, the housing cools faster than the oil inside. Metal conducts heat away rapidly when submerged. The air contracts. Instead of positive pressure pushing out, you’ve got negative pressure pulling in.
Your transfer case faces the same issue. The NV241 or NV241OR also vents through a breather line that terminates near the transmission crossmember — low enough to submerge during any serious water crossing. Three potential failure points, all at roughly the same height. This vulnerability affects all JK model year variations, from 2007 to 2018 production.
Jeep positioned these breathers based on street driving requirements and light off-road use. They work perfectly for the Rubicon Trail’s nominal 19-inch water crossing sections. Go deeper or spend more time in the water and you’re gambling with expensive internals. The vacuum effect doesn’t care about your insurance deductible.
Extended Breather Kit Features That Matter
Length matters first. You need 5-6 feet of vent line minimum to reach from your rear axle to a safe mounting point under the hood. Kits with 4-foot lines force compromises — mounting behind the grille or finding creative routing that still leaves you vulnerable if you’re running a snorkel and planning deep crossings.
Check valves are the critical upgrade. A basic extended vent line helps by raising the termination point above water level. But if you’re crossing slowly through deep water, or if a wave hits the grille area where many people mount vent filters, you can still get backflow. One-way check valves solve this by allowing air to vent out during heating but physically blocking any backflow during cooling. Even if the vent line fills with water during a prolonged crossing, the check valve prevents it from reaching the axle housing.
Filter elements are optional but useful in dusty environments. Foam or paper filter housings at the end of your vent lines prevent dust ingestion when you’re running through the Kalahari or across dry lakebeds. They add maintenance — filters need cleaning or replacement every 1-2 years — but that’s preferable to grinding desert sand through your diff bearings. If your primary concern is water crossings in forested areas, skip the filters and save the hassle.
Mounting location determines real-world protection level. Common options include inside the air box (stays dry but requires drilling), behind the grille (easy access for filter cleaning but can still get wet), or zip-tied to existing wiring harness under the hood (most protected, least convenient for inspection). Mounting inside the cabin is technically possible but creates a gear oil smell problem if any breather ever weeps.
You need three complete assemblies for proper protection: front differential, rear differential, and transfer case. Kits are usually sold as complete three-port systems with enough line for all three. Check what’s included before buying — some budget kits only provide two lines and assume you’ll reuse a factory breather for the third point.
Fitting quality varies between brass and plastic. Brass fittings with 11mm hex flats are standard on most axles. Plastic push-to-connect fittings are easier to install but can crack from engine bay heat or trail vibration. Barbed fittings require hose clamps but are more reliable long-term than quick-disconnects. Compatibility with different JK body styles and configurations may affect routing options, so verify before purchasing.
Installation difficulty is low if you’re comfortable routing lines and working with basic hand tools. Figure 1-2 hours for a first-time install. The hardest part isn’t the mechanical work — it’s routing lines neatly away from exhaust components and securing them so they don’t chafe through on sharp edges during articulation.
Top Extended Differential Breather Kits for JK
Premium filtered systems with check valves offer maximum protection for serious water fording. These kits integrate foam filter housings at each vent line terminus plus inline one-way valves between axle and filter. The dual-layer protection means even if filters get submerged during prolonged crossings, check valves block backflow into your Dana 30 or Dana 44 housings.
Maintenance requirements include quarterly filter cleaning for dusty conditions, or every 6-12 months for typical trail use. Remove filter housings, wash foam elements in soapy water, air dry completely, then reinstall. This upkeep makes sense for multi-day expeditions where diff failure creates safety risks, not just repair costs. Weekend trail riders can save complexity with simpler systems.
[AFFILIATE PRODUCT CARD: Rugged Ridge 17755.01 3-Point Extended Breather Kit with Filters - $69-79]
Mid-range check valve systems represent the best value for most JK owners. You get mechanical one-way flow control preventing backflow during cooling cycles, extended vent lines reaching engine bay height (30+ inches), and zero filter maintenance. The check valves provide critical protection against vacuum-induced water ingestion — the primary failure mode during crossings.
Dust ingestion through open vent lines is minimal in practice. Your differentials see far more contamination from worn seals and normal bearing wear than from airborne particles entering through properly routed vent terminations. This protection level suits 90% of trail use cases, from occasional stream crossings to repeated water obstacles during full-day rides.
[AFFILIATE PRODUCT CARD: Crown Automotive 5183520AA Extended Breather Kit with Check Valves - $54-64]
Budget basic extension systems without check valves offer entry-level protection through height differential alone. You’re relocating vent points from frame rail (19-24 inches) to engine bay (30+ inches) using longer hoses and replacement fittings. That’s adequate for shallow crossings completed quickly — drive through 15 inches at moderate speed and you’re protected.
The limitation appears during slow crawls through deeper water or if you get stuck mid-stream. Without mechanical backflow prevention, you’re relying entirely on keeping vent terminations above water surface. Miss that calculation by a few inches during a challenging exit line and vacuum effect can still pull water into housings despite the extended routing.
[AFFILIATE PRODUCT CARD: Omix-ADA 17752.51 Basic 3-Point Vent Line Extension Kit - $38-45]
Budget and DIY Breather Options
Basic extended vent line kits without check valves offer entry-level protection for casual trail users. You’re getting longer hoses and replacement fittings to relocate your vent points from frame rail to engine bay. That’s it. No one-way valves, no filters, just height-based protection.
This works if you’re crossing shallow water quickly. Drive through a 15-inch stream at moderate speed and you’re probably fine — your vent lines terminate above the water and the crossing doesn’t last long enough for significant vacuum to develop. But crawl through a 20-inch crossing slowly, or get stuck mid-stream while you figure out the exit line, and you’re risking backflow despite the extended lines.
The budget approach makes sense if your water crossings are measured in seconds, not minutes. If most trail riding involves dirt roads with occasional shallow fords, basic line extension provides adequate protection. Just understand you’re relying entirely on height differential between water surface and vent point. There’s no backup if things go sideways. Understanding common JK problems by year helps identify whether earlier model years need extra protection measures.
[AFFILIATE LINK: Check prices on budget vent extension kits on Amazon]
DIY kits appeal to hands-on Jeepers who want maximum flexibility in routing and mounting. You’re buying raw components: bulk vent line tubing, brass barbed fittings, hose clamps, and zip ties. No instructions. No predetermined line lengths. You measure, cut, route, and secure everything yourself.
The advantage is customisation. Run your lines exactly where you want them. Use the mounting points that make sense for your specific build. Add extra slack for suspension articulation in the spots where you need it. If you’ve already got a heavily modified JK with aftermarket bumpers, winch, or relocated battery, off-the-shelf kits sometimes don’t account for your unique routing challenges.
You can add check valves separately to any DIY setup. Buy inline one-way valves with 1/4” or 3/8” barbed fittings and splice them into your vent lines between the axle and the termination point. Total cost runs $10-15 per valve. Install them with the arrow pointing away from the diff — reverse them and you’ll trap pressure inside the housing and blow seals.
[AFFILIATE LINK: Check prices on DIY breather components on Amazon]
Cost savings are real but modest. A complete DIY setup with check valves costs $35-45 in parts versus $50-70 for a pre-packaged kit. You’re saving $15-25 in exchange for spending an extra hour measuring, cutting, and problem-solving your routing. Worth it if you enjoy that kind of work. Not worth it if you’d rather install a proven kit and get back to driving.
Alternative: Individual Differential Breather Filters
Individual breather filters mount directly to your differential cover using the factory breather port. Instead of a vent line running to the engine bay, you’re threading a small cylindrical filter element directly onto the axle housing. The filter sits exposed to air at the top of the diff, typically just below frame rail level.
This approach makes sense for desert and dusty environments where water crossings aren’t part of your trail plan. The Southwest US, Australian Outback, and Namibia’s Skeleton Coast are classic use cases. You’re preventing dust ingestion while maintaining proper venting. Installation takes five minutes: remove the factory breather fitting, apply thread sealant to the filter base, thread it in, done.
These filters provide zero protection for water crossings. They’re not designed for it. Submerge an individual breather filter and you’re getting water in your diff exactly like you would with a factory breather. The filter element will wick water into the housing via vacuum effect during cooling. You’ll end up with the same milky gear oil and destroyed bearings.
Popular in dry climates but useless anywhere you’re fording streams, crossing beaches at low tide, or dealing with mud holes. If your JK sees water deeper than a puddle, individual filters are the wrong solution. You need extended vent lines with the termination point above maximum water depth. For off-road enthusiasts upgrading their build, differential covers provide additional underbody protection alongside breather systems.
The confusion happens because both products are called “diff breathers” and both address contamination issues. One addresses dust. One addresses water. They’re not interchangeable. Know your primary threat and choose accordingly.
How to Install an Extended Diff Breather Kit on Your JK
You’ll need an 11mm wrench or socket, wire cutters or side-cutters for zip ties, and optionally a drill if you’re mounting filter housings to a solid surface. Most kits come with enough zip ties. Grab extras anyway — they’re cheap insurance against a line chafing through.
Start by locating your factory breathers. Front Dana 30 or Dana 44: look at the top of the diff housing near the pinion side. You’ll see a small brass or steel fitting with a rubber hose running upward toward the frame rail. Rear Dana 44: top centre of the pumpkin, similar fitting. Transfer case: passenger side of the case, usually near the rear output shaft. All three use 11mm fittings.
Remove each factory breather fitting with your 11mm wrench. They’re pipe thread into cast aluminium or cast iron. You’ll need moderate force to break them loose after years of heat cycling. Once out, inspect the threads in the housing. If you see stripped threads or cross-threading damage, stop — you’ll need a thread repair kit or a machine shop before proceeding. Clean threads are critical for a leak-free seal.
Install the new breather fittings from your kit. Most kits provide brass barbed fittings that replace the factory pieces. Apply a small amount of thread sealant (not Teflon tape, which can shred and contaminate your gear oil) to the male threads. Thread them in by hand first to ensure you’re not cross-threading. Snug them down with the wrench. You’re working with aluminium castings — overtightening cracks housings.
Route your vent lines from each axle up to the engine bay. The cleanest path follows the frame rail on the passenger side for the front diff, drivers side for the rear. Use existing wiring harness routing where possible. Avoid the exhaust at all costs — vent line tubing melts at temperatures you’ll see during extended trail use. Leave extra slack near the axles to accommodate suspension articulation. Stuff droops and the axle drops away from the frame, pulling your vent line taut.
Choose your termination point carefully. Inside the air box is protected but requires drilling. Behind the grille is convenient but can still get wet during deep crossings. Under the hood zip-tied to existing harness routing is my preference — stays dry, easy to inspect, doesn’t require permanent modifications. The routing complexity may vary depending on whether you’re running soft tops versus hard tops, as this affects hood access points.
Install check valves inline if your kit includes them. The valve body has an arrow indicating flow direction. That arrow must point away from the differential toward the termination point. Install it backwards and you’ll trap pressure inside the axle during heating. You’ll blow pinion seals within a week.
Secure your lines every 12-18 inches with zip ties. Attach to frame rails, existing harness routing, or any solid mounting point that doesn’t move during suspension travel. Lines that hang loose will chafe through on sharp edges. You’ll find the failure three months later when you’re inspecting for water intrusion and discover a severed vent line.
Test for leaks after installation. Start your Jeep and let it idle for five minutes. Inspect each breather fitting where it threads into the axle housing. You’re looking for any sign of gear oil seepage. A slight oil sheen is normal — gear oil vapour vents through these lines. Active dripping means your fitting isn’t tight enough or you’ve got damaged threads.
Common installation mistakes include routing near exhaust components (melted tubing three trails later), forgetting the transfer case breather entirely (two out of three isn’t adequate), and installing check valves backwards (blown seals). Also: skipping the thread sealant and wondering why your diff is leaking a week later.
Checking for Water Intrusion After Trail Rides
Extended breathers reduce risk. They don’t eliminate it. Axle seals can fail. Diff covers can develop hairline cracks. Pinion seals can leak. You need post-ride inspection protocol regardless of your breather setup.
Pull the differential fill plug after every trail ride that involved water crossings. You’ll find it on the side of the diff housing — Dana 30 and Dana 44 use a 3/8” square drive plug that accepts a standard ratchet. Stick your finger inside the fill hole and pull out a small amount of fluid.
Healthy gear oil is clear to amber coloured with a petroleum smell. It should look like what you poured in during your last fluid change — 75W-90 synthetic in most cases. If you pull out fluid that looks like chocolate milk, coffee with cream, or anything with a milky appearance, you’ve got water contamination. The emulsion is gear oil mixed with water. It destroys bearings in hours by washing away the oil film that prevents metal-on-metal contact.
Drain and replace the fluid immediately. Not tomorrow. Not after your next paycheque. Immediately. Water-contaminated oil creates bearing damage so quickly you can hear the difference within 50 kilometres. That whining sound is pitted bearing races. The clicking at low speed is spalled bearing rollers. By the time you hear it, you’re looking at a bearing replacement at minimum.
Your transfer case needs the same inspection. The NV241 uses a similar fill plug arrangement. Check the fluid the same way — stick your finger in, pull out a sample, inspect for milky appearance. Transfer case bearings are expensive and labour-intensive to replace. Catching water intrusion early means draining fluid instead of replacing hard parts.
Inspection frequency scales with water crossing frequency. Trail ride with one shallow stream crossing? Quick visual check. Multi-day trip through the Okavango Delta with 30+ crossings? Check fluid every evening in camp. I consider this non-negotiable for any serious expedition use. Incorporating breather maintenance into your spring trail prep checklist ensures you’re protected before the season begins.
Extended breathers aren’t 100% foolproof. They prevent the majority of water ingestion by eliminating the vacuum-induced suction through vent lines. But differential seals can still fail under pressure. Pinion seals can leak. Axle tube seals can crack. Inspecting fluid after water exposure catches all these failure modes, not just breather-related ingestion.
The Dana 44 front and rear axles in a Rubicon are worth protecting with inspection discipline. If you’ve regeared to 4.56 or 4.88 like I did, you’ve got fresh ring and pinion sets that cost real money. Checking diff fluid takes two minutes. An axle rebuild takes two thousand dollars and a week without your Jeep.
Common Questions About JK Diff Breathers
Do I need extended breathers if I never cross water?
Not strictly necessary, but they provide value even in dry conditions. Extended vent lines reduce dust ingestion when you’re running across dry lakebeds or on any trail with fine powder dust. That dust would otherwise enter through factory breathers at frame rail height where your tyres kick it up constantly. Engine bay mounting puts your vent points in cleaner air. Not critical for pavement use, worth considering for serious dry-climate trail running.
Will extended breathers void my warranty?
No. This is a bolt-on accessory that doesn’t modify powertrain components. It’s comparable to installing a roof rack or running boards — external additions that don’t affect covered systems. Jeep can’t void your powertrain warranty because you relocated vent lines. If your dealer gives you trouble, ask them to cite the specific warranty clause you’ve violated. There isn’t one. Extended breathers are common enough that any service department familiar with Wranglers has seen them dozens of times.
Can I just use longer hose on the factory breathers?
Yes, but adding check valves is highly recommended. You can buy bulk vent line tubing, remove your factory short hoses, and attach longer sections that reach the engine bay. This provides the height-based protection that prevents submersion. What it doesn’t provide is backup protection if you cross deeper than expected, get stuck mid-stream, or encounter a wave that hits grille height. Check valves cost $10-15 each and add mechanical one-way flow control that pure line extension can’t provide.
How often should I replace breather filters?
Every 1-2 years or when visibly dirty, assuming your kit includes filter elements. Pull the filter housing and inspect the foam or paper element. If it’s caked with dust or shows restricted airflow when you blow through it, clean or replace it. Foam filters wash with soapy water and air dry. Paper elements are disposable — buy replacements from the kit manufacturer. Neglected filters restrict venting and can cause the same pressure buildup that breathers are supposed to prevent.
Do I need to extend all three breathers?
Yes. Front differential, rear differential, AND transfer case all need extended breathers. All three components vent to atmosphere. All three are positioned low enough to submerge during water crossings. All three create vacuum during cooling. Doing two out of three is inadequate — you’ve left one component vulnerable to the exact failure mode you’re trying to prevent. Complete kits include three sets of fittings and vent lines for exactly this reason.
What happens if I install check valves backwards?
Your differential builds pressure and blows seals. The arrow on the valve body indicates the direction air should flow — away from the axle toward the vent termination point. Reverse this and you’ve created a one-way valve that traps expanding air inside the housing during heating. That pressure has to go somewhere. It’ll force gear oil past pinion seals and axle shaft seals until you’ve got oil dripping on your driveway. Fix this immediately if you discover it.
Can I mount breathers inside the cabin?
Not recommended. If any breather fitting develops a slight leak, or if any vent line weeps a small amount of gear oil vapour, you’ll smell it inside the cabin. Gear oil has a distinct petroleum smell that permeates soft goods. Your upholstery will absorb it. Your carpet will hold it. Passengers will comment. Engine bay mounting keeps any potential smell outside the vehicle where airflow disperses it.
What’s the difference between extended breathers and snorkels?
Snorkels relocate your air intake to roof height, preventing water ingestion into the engine during deep crossings. Extended breathers relocate differential and transfer case vents to engine bay height, preventing water ingestion into axles. Both serve similar purposes for different components. Neither protects the other’s vulnerable area. A snorkel without extended breathers still risks diff contamination. Extended breathers without a snorkel still risk hydrolocking the engine. Serious water crossers need both.
Do I need to change diff fluid after installing breathers?
Not necessary unless you suspect water contamination already exists. Installing extended breathers is preventative maintenance, not corrective. If you’ve recently crossed water with factory breathers and haven’t checked fluid yet, pull the fill plug and inspect before you install the new system. Milky fluid means water got in — drain and replace before proceeding. Clean amber fluid means you’re fine — install breathers and continue with existing oil. Standard diff fluid change intervals remain: every 50,000km for street use, every 25,000km for heavy trail use, immediately if contaminated.
Final Thoughts: Cheap Insurance for Expensive Axles
A $50 breather kit prevents a $2,000 axle rebuild. The value proposition is straightforward. Extended breathers with check valves protect your Dana 30 or Dana 44 front, Dana 44 rear, and NV241 transfer case from water ingestion during crossings. They’re mandatory equipment for any JK that sees trails with water obstacles.
Mid-range kits with check valves represent the sweet spot for most JK owners. You get mechanical one-way flow protection without the maintenance complexity of filter elements. Spend $50-70 once and stop worrying about vacuum-induced water ingestion. Install it before your first water crossing, not after you’ve pulled milky fluid from your diff breathers.
This matters especially if you’ve invested in premium internals. Rubicon owners running factory Dana 44 axles front and rear have expensive components worth protecting. Anyone who’s regeared for larger tyres has fresh ring and pinion sets that cost real money to install. After spending significant money on regearing, the last thing you want is contaminated oil destroying those bearings because you skipped a $60 breather kit.
The modification takes 1-2 hours with basic hand tools. Route vent lines from your three breather points up to engine bay height. Install check valves with arrows pointing away from axles. Secure everything with zip ties. Test for leaks. You’re done. This isn’t a complex build project requiring fabrication or welding. It’s bolt-on protection that anyone comfortable with basic maintenance can complete in an afternoon.
[AFFILIATE LINK: Shop extended differential breather kits on Amazon]
If you’re planning a trail ride with water crossings, install extended breathers first. Don’t gamble with factory vent lines terminating at frame rail height. The vacuum effect during cooling is physics, not a possibility. Hot diffs entering cold water create negative pressure. That pressure pulls water through any submerged vent opening. Extended breathers with check valves eliminate both the submersion risk and the backflow mechanism.
Check your diff fluid after every trail ride with water crossings. Pull the fill plug, inspect for milky appearance, catch contamination early. Extended breathers reduce ingestion risk but axle seals can still fail. Inspection discipline catches all failure modes, not just breather-related ones.
If you’re building a JK for serious expedition use — anywhere water crossings are inevitable — this upgrade is non-negotiable. It’s cheap insurance against expensive failures in remote locations where parts availability and workshop access are measured in days, not hours.
Get the Free JK Build Planner
Complete PDF with mod checklists, gear ratios, tire sizing charts, and budget worksheets. Everything you need to plan your JK build.
No spam. Unsubscribe anytime. By subscribing, you agree to our Privacy Policy.
Jeep JK Guide
We're JK owners who've been building, breaking, and fixing Wranglers for years. Everything here is tested on our own rigs - no sponsored fluff, just honest recommendations.
Learn more about us →Get the JK Build Planner
Free PDF with complete build checklists, gear ratios, and tire fitment guides.
By subscribing, you agree to our Privacy Policy.
Related Articles
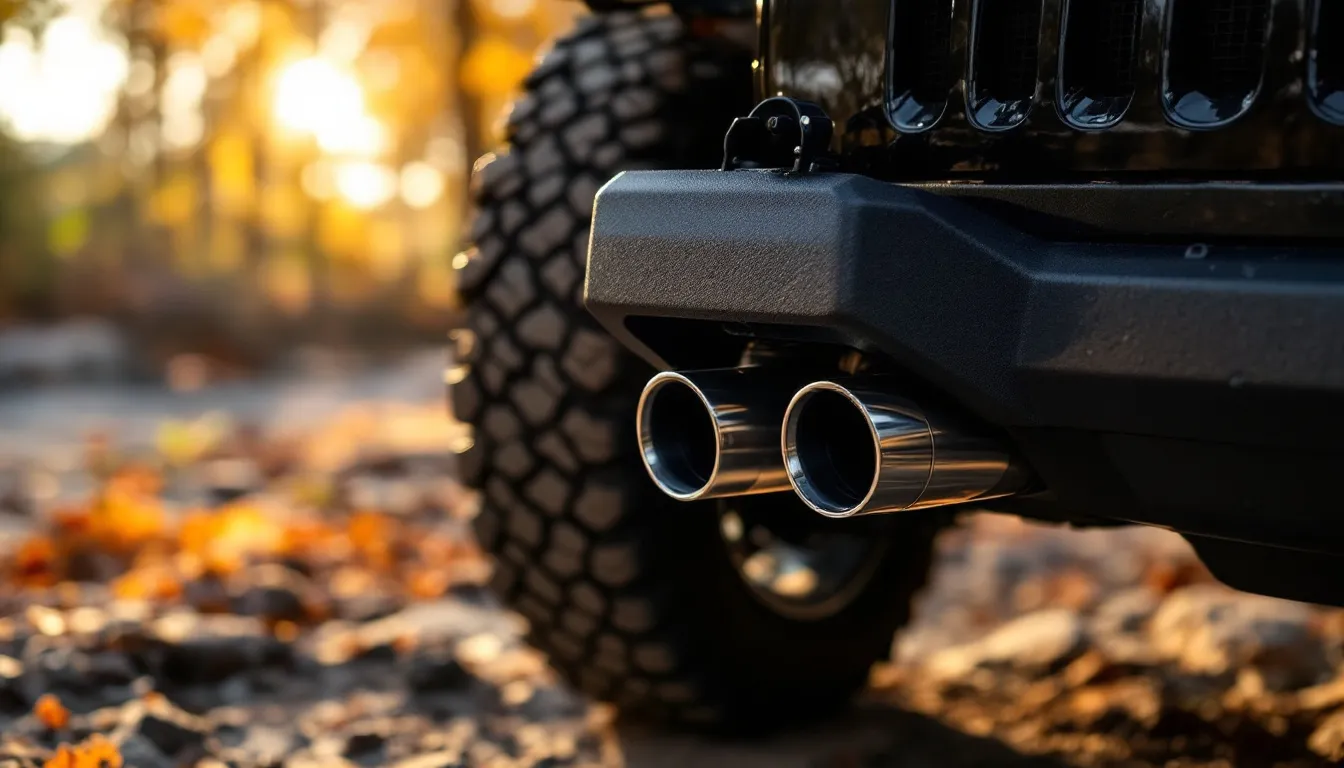
Best Axle Back Exhaust For Jeep JK: Expert Picks & Buying Guide
Looking for the best axle back exhaust for Jeep JK? Our expert guide covers sound, performance, installation, and top recommendations for 2007-2018 Wranglers.
Best Diff Breathers for Jeep JK: Extended Vent Kits & Water Fording Protection

Best Winch For Jeep JK Unlimited: Complete 2024 Guide
Expert guide to choosing the best winch for your JK Unlimited. Learn capacity sizing, synthetic vs steel rope, installation tips, and essential accessories for trail recovery.