JK Hi-Lift Jack Guide: Safe Usage and Mounting Options

JK Hi-Lift Jack Guide: Safe Usage and Mounting Options
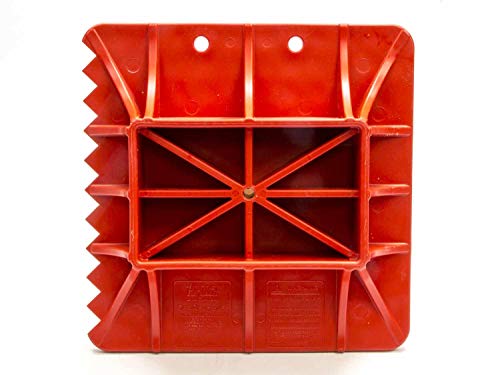
The Hi-Lift jack is the most versatile and most dangerous tool you’ll carry on your Jeep JK. Used correctly, it can lift your rig, winch you out of mud, spread apart stuck trail obstacles, and clamp materials together. Used incorrectly, it can maim you or destroy your vehicle.
This guide covers everything JK owners need to know about choosing, mounting, and safely operating a Hi-Lift jack in trail situations.
Why JK Owners Need a Hi-Lift Jack
The standard scissor jack that came with your JK is designed for roadside tire changes on pavement. On the trail, you need a tool that can:
- Lift from uneven, unstable surfaces
- Reach higher than stock jack heights allow
- Work when your JK is sitting at severe angles
- Double as a winch, spreader, or clamp
- Operate when wheels are buried in mud or sand
A Hi-Lift delivers all of this in a tool that’s been essentially unchanged for over a century because the design works.
Choosing the Right Hi-Lift Size
Hi-Lift HL-484 (48-inch)
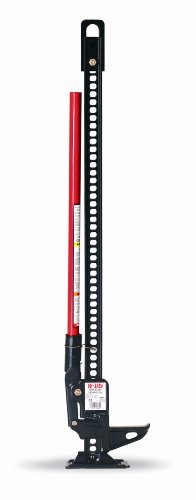
The 48-inch model handles most JK lifting situations. With stock suspension and 33” tires, you’ll have plenty of lift height for tire changes and recovery operations. This size fits most hood mounts and spare tire carriers without excessive overhang.
Best for: Stock to 2.5” lifted JKs running up to 35” tires.
Hi-Lift HL-604 (60-inch)
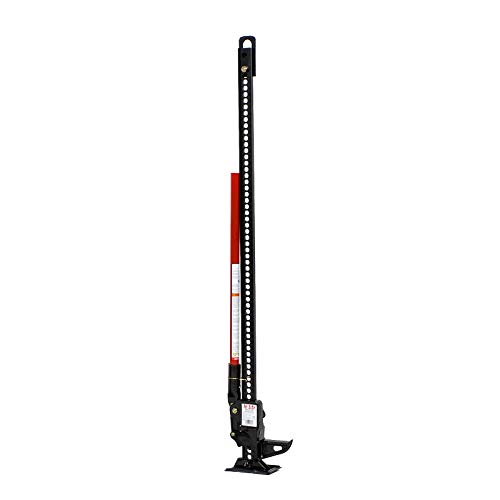
If you’re running a 4”+ lift with 37” tires, the 60-inch model provides necessary additional height. The longer beam also gives more leverage for winching operations. The tradeoff is added weight and length that makes mounting more challenging.
Best for: 4”+ lifted JKs with 37” tires, or those who frequently use the jack for winching.
All-Cast vs Cast/Steel Construction
Hi-Lift offers two construction options:
Cast/Steel (Standard): Cast iron base and top with a stamped steel beam. Lighter weight and more than adequate for occasional use. The steel beam can bend under extreme loads but won’t shatter.
All-Cast: Entire jack is cast iron. Heavier and more rigid. Preferred for commercial or daily professional use. Overkill for recreational Jeeping.
For most JK owners, the standard Cast/Steel version delivers excellent performance at a lower price and weight.
Safe Jack Points on the Jeep JK
Finding the right lift point prevents vehicle damage and jack slippage. Here are the approved locations:
Front Lifting
Bumper lift points: If you have an aftermarket steel bumper with integrated jack points, use them. Many bumpers from Smittybilt, Barricade, and Rugged Ridge include reinforced tabs specifically designed for Hi-Lift use.
Factory bumper: The stock JK bumper cannot handle Hi-Lift loads. You’ll need a lift mate adapter on the wheel, or lift from the axle.
Front axle: Position the jack under the axle tube, not the differential housing. The tube distributes load across the axle better.
Rear Lifting
Aftermarket bumper points: Same as front—use dedicated lift points if your bumper has them.
Rear axle: Lift from the axle tube near the wheel, not the center section.
Receiver hitch: With a compatible adapter, you can lift from the 2” receiver. Ensure the hitch is properly rated and the adapter distributes load correctly.
Rock Slider Jacking
Steel rock sliders with solid mounting provide excellent Hi-Lift points along the rocker panel. Check with your slider manufacturer to confirm they’re rated for jacking. Most quality sliders handle Hi-Lift loads easily.
Warning: Never jack from factory rocker panels, pinch welds, or body panels. They will crush, and the jack will slip.
Essential Hi-Lift Accessories
Hi-Lift Lift-Mate
The Lift-Mate attaches to your wheel and provides a solid lift point when your JK lacks bumper tabs. Essential for stock or lightly modified JKs. It grips the wheel rather than the tire, so deflated tires don’t affect operation.
Hi-Lift Handle-Keeper
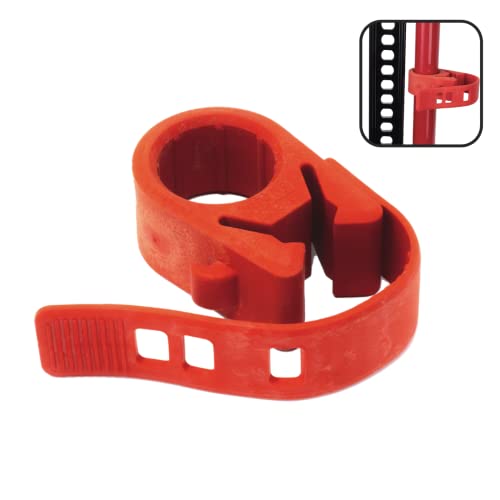
The most dangerous Hi-Lift moment is when the mechanism releases under load and the handle whips around. The Handle-Keeper provides a tether that limits handle travel, preventing serious injuries.
Off-Road Base
On sand, mud, or soft dirt, the Hi-Lift’s small base footprint causes it to sink as you lift. The Off-Road Base spreads the load over a much larger area, providing stable operation in the worst conditions.
Hi-Lift Mounting Options for JK
Exterior mounting provides quick access without consuming cargo space. Here are the most popular JK mounting solutions:
Hood Mounting
Hood mounts keep the jack visible and accessible. The jack lies flat across the hood, typically with a quick-release mechanism. Considerations:
Pros: Easy access, impressive trail look, doesn’t consume cargo space Cons: Potential hood damage from vibration, affects aerodynamics, visible to thieves
Popular hood mounts include designs from Rugged Ridge and Warrior Products. Ensure the mount includes vibration damping to prevent hood dents.
Spare Tire Carrier Mounting
Many aftermarket tire carriers include Hi-Lift mounting points or can be fitted with brackets. The jack mounts vertically alongside your spare.
Pros: Protected from theft, doesn’t affect visibility, integrated with carrier Cons: Added weight on rear swing-out, may require longer carrier for clearance
Roll Bar Mounting
Interior roll bar mounts keep the jack inside your JK, protected from weather and theft. Quick-release brackets make deployment fast.
Pros: Secure, weather-protected, always within reach Cons: Consumes interior space, must remove soft top or hard top for access
Bumper Mounting
Some aftermarket bumpers include integrated Hi-Lift mounting, particularly on front bumpers. The jack typically lies horizontally across the bumper face.
Pros: Extremely accessible, doesn’t affect interior or hood Cons: Vulnerable to trail damage, can snag on obstacles, adds front weight
Safe Hi-Lift Operation: Step by Step
Follow this procedure every time you use a Hi-Lift:
Setup
-
Chock the wheels. Place rocks, logs, or wheel chocks on the downhill side of tires that will remain on the ground.
-
Engage the parking brake and leave the JK in gear (or Park for automatics).
-
Position the jack. Place the base on solid ground. If ground is soft, add the Off-Road Base or a flat rock/board under the jack.
-
Secure the load direction. The jack should lean slightly toward the vehicle—never away from it.
Lifting
-
Verify the reversing latch position. The small lever on the climbing pin must be in the “up” position for lifting.
-
Begin pumping. Use smooth, full strokes. Keep your body to the side of the handle’s arc, never behind it.
-
Watch the vehicle and jack constantly. If either starts moving or leaning, lower immediately.
-
Lift only as high as necessary. More height means more instability.
Lowering
-
Flip the reversing latch to the “down” position. This changes the pump direction to lowering.
-
Pump slowly downward. Lower under control—don’t release quickly.
-
Keep hands clear of pinch points as the mechanism descends.
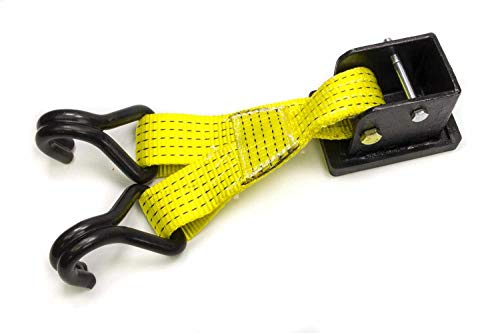
Hi-Lift as a Winch
With the proper winching attachment, your Hi-Lift can pull your JK from stuck situations when no anchor point exists for a standard winch.
The process works by extending the jack, attaching chains to both the vehicle and an anchor, then using the jack’s mechanical advantage to pull the vehicle forward. Each jack stroke moves the vehicle a few inches. It’s slow but effective when nothing else will work.
Required accessories:
- Winch attachment kit with chains and hooks
- Tree saver strap for anchor protection
- Heavy-duty gloves
This technique requires practice in non-emergency situations. Master it before you need it.
Common Hi-Lift Mistakes
Using the jack at angles: The Hi-Lift is designed for vertical operation. Angles greater than 10-15 degrees can cause the jack to kick out violently.
Ignoring soft ground: The jack will sink into mud, sand, or soft dirt. Always use a base extension.
Jacking from the bumper without reinforcement: Factory bumpers will crush. Use a Lift-Mate or jack from proper points.
Standing in the handle arc: When the mechanism releases, the handle whips with incredible force. Keep your body clear.
Over-lifting: More height means more danger. Lift only enough to complete your task.
Maintenance Requirements
A Hi-Lift requires minimal maintenance but benefits from regular attention:
- Lubricate the beam and mechanism annually with white lithium grease or dry film lubricant
- Check the climbing pins for wear or damage
- Inspect the handle pivot for excessive play
- Clean mud and debris from the mechanism after trail use
- Store horizontally when possible to prevent moisture accumulation
A well-maintained Hi-Lift will outlast your Jeep.
Our Recommendations
For most JK owners: The 48” Hi-Lift HL-484 handles typical lifting needs at a reasonable size and weight. Pair it with a Lift-Mate and Off-Road Base for maximum versatility.
For lifted JKs with large tires: Step up to the 60” HL-604 for additional height clearance. The extra length is necessary when running 37” tires on 4”+ of lift.
Essential accessories: Handle-Keeper for safety, Lift-Mate for stock bumper JKs, and Off-Road Base for soft terrain. These three additions transform the Hi-Lift from useful to indispensable.
Respect the Hi-Lift, train with it before trail emergencies, and it will pull your JK out of situations nothing else can handle.
Complementary Upgrades
Explore these related modifications for your Jeep JK:
- JK Armor & Protection Guide — your complete starting point
- JK Recovery Gear Checklist — the hi-lift is a recovery essential
- Best JK Front Bumpers — bumper jack points for hi-lift use
- Best D-Ring Shackles for JK — pair with your hi-lift for winching
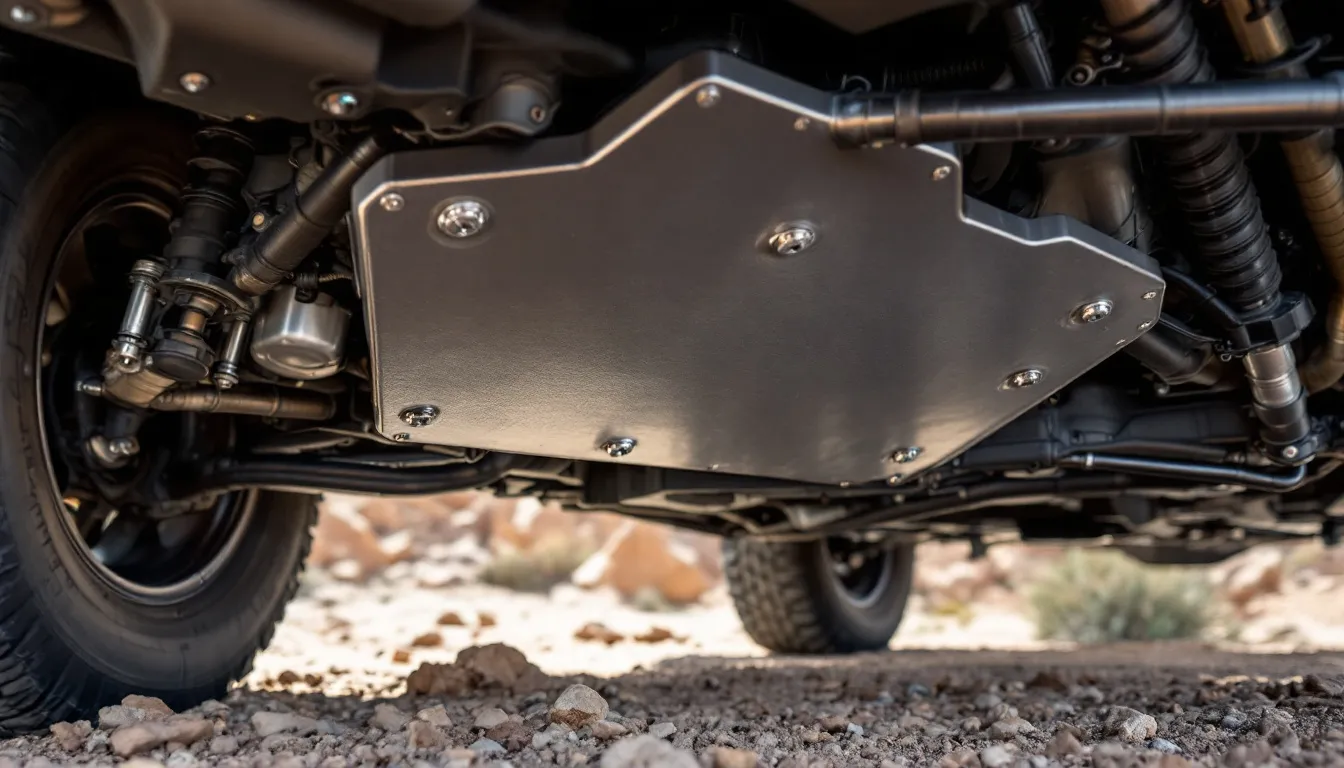
- Best JK Skid Plates — protect your underside too
- Best JK Lift Kits — lifted JKs need a 60-inch jack
Hi-Lift Jack Comparison
| Model | Capacity | Weight | Height | Price | Best For |
|---|---|---|---|---|---|
| Hi-Lift HL-484 | 7,000 lbs | 32 lbs | 48” | $150-200 | Standard JK |
| Hi-Lift Cast Iron | 7,000 lbs | 38 lbs | 48” | $160-210 | Durability |
| ARB Airbag Jack | 7,000 lbs | 2 lbs | N/A | $120-180 | Portability |
| Safe Jack Hydraulic | 7,000 lbs | 45 lbs | 48” | $200-250 | Safety |
Hi-Lift HL-484
Pros
- Legendary reliability
- Wide parts availability
- Proven track record
- Reasonable price
Cons
- Heavy to carry
- Steep learning curve
- Can be unstable
ARB Airbag Jack
Pros
- Extremely compact
- Lightweight at 2 lbs
- No mechanical parts
- Easy to use
Cons
- Need compressor
- Cannot be solo
- Limited use
Related Guides
Explore more JK upgrade guides to complement your build:
- Best JK Rear Bumpers — rear bumper choices
- Rock Sliders vs Rocker Guards — side protection comparison
- Best JK Fender Flares — fender flare options for larger tires
- Best Winches for JK — winch selection for recovery
- Best JK Steering Stabilizer — steering stabilizer options after lift
- Best All-Terrain Tires — tire choices for off-road capability
Frequently Asked Questions
Can I use a Hi-Lift on my stock JK bumper?
No, the factory JK bumper will crush under Hi-Lift loads. Use a Lift-Mate attachment on the wheel, lift from the axle, or upgrade to an aftermarket steel bumper with jack points.
How often should I lubricate my Hi-Lift?
Lubricate the beam and mechanism at least once per year, or after any muddy trail use. White lithium grease or dry film lubricant works best.
Is the 48” or 60” Hi-Lift better for a 35” tire setup?
The 48” model provides adequate height for most 35” tire setups with up to 3.5” of lift. If you have more lift or plan to upgrade to 37s, choose the 60” model.
Can a Hi-Lift damage my JK?
Yes, if used improperly. Jacking from unsupported body panels, pinch welds, or factory bumpers will cause damage. Always use approved jack points.
Should I buy the All-Cast or Cast/Steel Hi-Lift?
The Cast/Steel model handles recreational Jeeping perfectly at lighter weight and lower cost. The All-Cast is designed for commercial daily use and is overkill for weekend trail riders.
How do I prevent my Hi-Lift from rusting?
Keep the jack clean and dry, lubricate annually, and consider a cover if mounting externally. Some owners paint their jacks for additional corrosion protection.
Get the Free JK Build Planner
Complete PDF with mod checklists, gear ratios, tire sizing charts, and budget worksheets. Everything you need to plan your JK build.
No spam. Unsubscribe anytime. By subscribing, you agree to our Privacy Policy.
Frequently Asked Questions
What should I prioritize when modifying my JK?
Start with safety and reliability upgrades, then tires and suspension. Build your JK progressively based on your actual use and trail experience.
How much should I budget for JK modifications?
Budget varies widely by goals. Basic trail capability can cost $2,000-5,000. Full builds with armor, lockers, and regearing can exceed $15,000-20,000.
Will modifications affect my JK's resale value?
Quality modifications from reputable brands typically maintain or increase JK resale value. Keep original parts and documentation for future buyers.
Where are the safe Hi-Lift jack points on a Jeep JK?
The safest Hi-Lift jack points on a JK are the front bumper (if aftermarket with jack points), rock sliders, and rear bumper recovery points. Never jack from the body panels or fender flares. Using a Lift-Mate attachment on the wheels is the safest option for stock JKs.
What height Hi-Lift jack do I need for a lifted JK?
For stock to 2.5-inch lifts, a 48-inch Hi-Lift is sufficient. For 3.5-inch and taller lifts, especially with 35-inch tires, a 60-inch model provides necessary reach. Measure from your jack point to the ground and add 12 inches for safe working range.
Jeep JK Guide
We're JK owners who've been building, breaking, and fixing Wranglers for years. Everything here is tested on our own rigs - no sponsored fluff, just honest recommendations.
Learn more about us →Get the JK Build Planner
Free PDF with complete build checklists, gear ratios, and tire fitment guides.
By subscribing, you agree to our Privacy Policy.
Related Articles
Best Gas Tank Skid Plate for Jeep JK: Armor Your Fuel System
Best Grill Inserts for Jeep JK: Mesh, Angry Eyes & Custom Grille Options
Best Snorkel for Jeep JK: Water Fording & Engine Protection Options
Discover the best snorkel for Jeep JK with our expert comparison of top kits. Learn about water fording depth, dust protection, installation, and whether you actually need one.