How to Install a Winch on Jeep JK: Complete DIY Installation Guide
How to Install a Winch on Jeep JK: Complete DIY Installation Guide
I spent an entire weekend installing my first winch setup—a steel front bumper and 10,000 lb winch on my 2012 JK. By Sunday evening, I’d fought corroded frame bolts, discovered how much that extra 150 pounds affects steering feel, and ultimately pulled myself out of a muddy trail section that would’ve otherwise required a tow truck. That first successful recovery made every scraped knuckle worth it.
How to install a winch on jeep jk: Mount the winch securely to a winch-compatible bumper using Grade 8 bolts torqued to spec, run 2 AWG or larger cable directly to the battery with a fuse within 18 inches of the positive terminal, connect the ground to a clean frame point, and test operation thoroughly before heading off-road. The complete installation takes 3-5 hours for first-timers with proper tools and preparation.
This guide walks you through every step of the process, from gathering the right tools to troubleshooting electrical gremlins. I’ll share the lessons I learned the hard way so you can avoid the same mistakes and get your winch installed correctly the first time.
Tools and Materials You’ll Need
Before you start loosening bolts, gather everything you’ll need. Nothing kills momentum faster than realizing you’re missing a critical tool halfway through the job.
Essential Tools:
- Socket set (metric and SAE) with 3/8” and 1/2” drive ratchets
- Torque wrench (capable of 35-75 ft-lbs)
- Wire strippers and crimpers designed for heavy gauge wire
- Multimeter for testing voltage and continuity
- Penetrating oil (PB Blaster or equivalent)
- Anti-seize compound
- Dielectric grease
- Thread locker (blue Loctite 242)
Materials and Parts:
- Winch rated for 1.5x your vehicle weight minimum (8,000-10,000 lb for most JKs)
- 2 AWG or 1/0 AWG welding cable (not automotive battery cable—marine/welding grade handles heat better)
- ANL fuse holder and appropriate fuse (150-200 amp depending on winch)
- Heavy-duty battery terminals or lugs
- Grade 8 mounting bolts (if not included with winch)
- Cable management clips and wire loom
- Shop towels and degreaser
Critical Safety Note: The wire gauge matters tremendously. Using undersized wire creates resistance, generates heat, and can start fires. Most 8,000-10,000 lb winches require 2 AWG minimum; larger winches need 1/0 AWG. Don’t cheap out here.
One important consideration: 2007-2011 JKs have slightly different battery tray configurations than 2012-2018 models. You may need to drill additional routing holes through the firewall or modify the battery tray area depending on your model year. Before purchasing your winch, verify that your bumper is actually winch-rated—not all aftermarket bumpers have proper mounting provisions or adequate strength for recovery loads.
Pre-Installation Preparation and Safety
Proper preparation prevents the kind of surprises that turn a Saturday afternoon project into a week-long ordeal.
Step 1: Choose Your Work Location
Park on a level surface in a well-lit area. You’ll need access to both the front of the vehicle and the engine bay simultaneously. A garage is ideal, but a driveway works fine.
Step 2: Disconnect the Battery
Always disconnect the negative battery terminal before working on electrical systems. This prevents accidental shorts that can weld tools to metal or damage sensitive electronics. Use a memory saver if you want to preserve radio presets.
Step 3: Inspect Bumper Mounting Points
Here’s where my corroded bolt experience comes into play. Before you lift that 80-pound winch into position, check your bumper’s mounting integrity. Grab the bumper and try to move it—any flex or looseness means you need to address the mounting first. Spray penetrating oil on frame bolt threads the night before installation if your Jeep has seen winter roads or serious trail time.
Step 4: Plan Your Wire Routing
2-door and 4-door JKs require different wire routing approaches. 4-door JKUs have significantly longer runs from the bumper to the battery—sometimes 2-3 feet more cable needed. Walk the path your cables will take before you start. Look for:
- Sharp edges that could cut through insulation
- Heat sources (exhaust manifolds, radiator hoses)
- Moving parts (steering linkage, suspension travel points)
- Existing wire routing channels through the firewall
Common JK electrical systems can be finicky, especially on older models. If you’re dealing with a pre-2012 JK that’s shown electrical gremlins, address those common JK electrical issues before adding the substantial electrical load of a winch.
Step 5: Read Your Winch Manual
I know it’s boring, but winch manufacturers include specific torque specs and mounting requirements for a reason. Spend ten minutes reading through the installation section. Note any model-specific requirements for your particular winch.
Safety Warning: Never work under a vehicle supported only by a jack. Use jack stands rated for your JK’s weight if you need to access the underside. Keep children and pets away from the work area—winch cables under tension can cause serious injury.
Choosing the Right Winch for Your JK
Not all winches are created equal, and choosing the right one sets the tone for your entire installation.
The Smittybilt XRC 9500 lb Winch is a popular budget-friendly option for JK owners seeking basic recovery capability. It provides solid reliability for moderate trail use without breaking the bank. If you’re looking for premium performance with advanced features, the VR EVO 12-S Electric Winch offers 12,000 lb pull capacity with synthetic rope and IP68 waterproofing, making it ideal for serious rock crawling and water crossings.
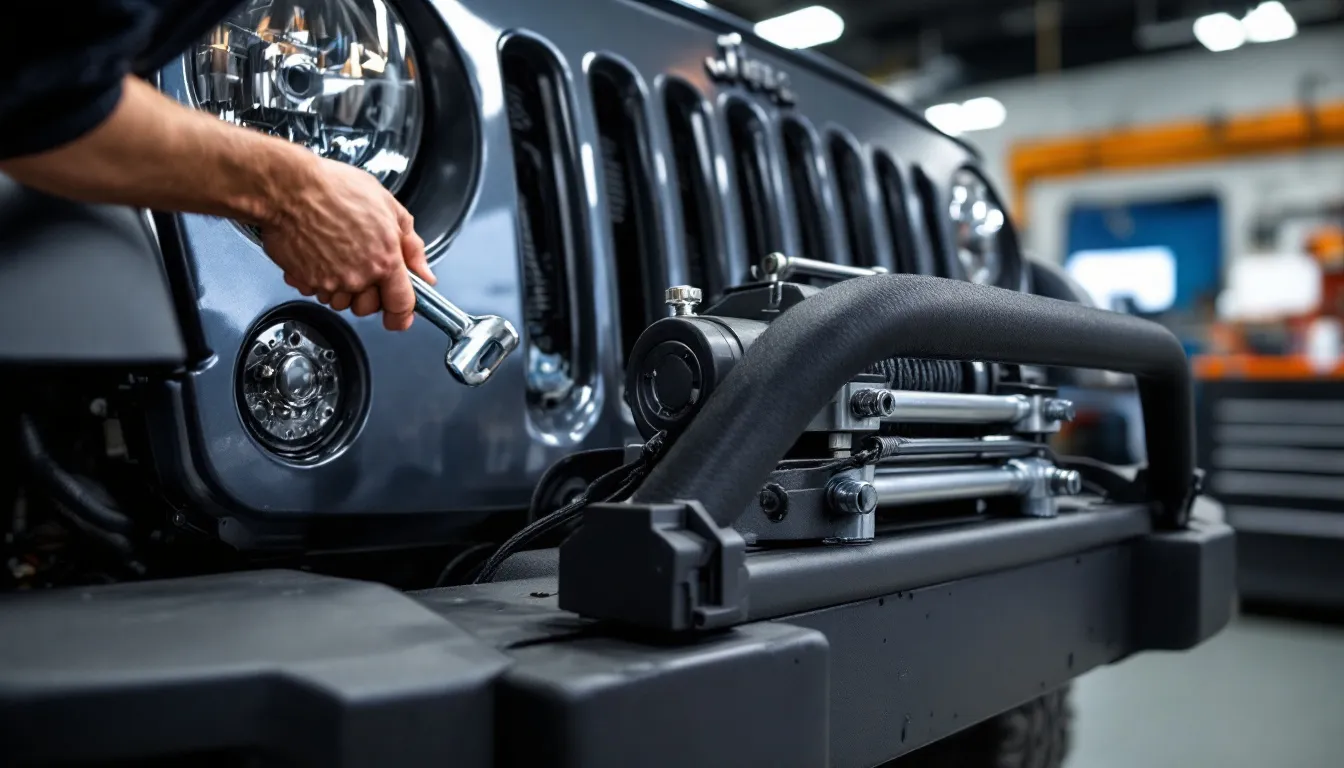
Step-by-Step: Mounting the Winch to Your Bumper
Now comes the heavy lifting—literally. A properly installed winch starts with the right bumper foundation. The (76807) XRC Gen 2 Front Bumper provides excellent winch mounting points with its robust construction and integrated fairlead design.
Step 1: Recruit a Helper
Don’t attempt this solo. Most winches weigh 60-90 pounds, and positioning them accurately while threading bolts requires four hands. I tried going solo on my first install and nearly dropped a Warn VR10 on my foot. Learn from my stupidity.
Step 2: Position the Winch
Lift the winch onto the bumper mounting plate. Most bumpers have a flat surface with four mounting holes that align with the winch’s base plate. The winch should sit flush against the mounting surface with the drum centered in the bumper opening.
Step 3: Thread Mounting Bolts
Insert all mounting bolts finger-tight first. Don’t torque anything down until all bolts are started—this gives you wiggle room for alignment. Most winches use four mounting bolts, typically 1/2” or 5/8” diameter.
Here’s where my corroded bolt experience taught me a valuable lesson: inspect the bolt threads carefully before installation. If your bumper has been installed for years, the mounting holes may have accumulated rust or debris. Chase the threads with a tap if needed, and apply a thin coat of anti-seize to the bolt threads. This prevents the bolts from seizing over time and makes future removal possible.
Step 4: Torque to Specification
Using your torque wrench, tighten the mounting bolts to manufacturer spec—typically 35-45 ft-lbs for most winches. Follow a crisscross pattern (like tightening lug nuts) to ensure even pressure distribution. Apply blue thread locker to the threads first.

Step 5: Verify Clearances
With the winch mounted, check that:
- The fairlead (cable guide) has adequate clearance from the bumper edges
- The cable drum can rotate freely without rubbing
- Control box mounting location is accessible but protected from impacts
- Remote control plug is easy to access but won’t collect mud and water
Critical Safety Note: The synthetic rope or steel cable that came spooled on your winch needs proper handling. Never grab a moving cable, and always inspect for frays or kinks before use. When I installed mine, I wore heavy leather gloves just to handle the cable during initial setup—even brand-new cables can have burrs that’ll shred your hands.
One thing they don’t tell you in installation videos: that extra 80-100 pounds hanging off your front bumper will affect steering feel, especially on 2-door JKs. The shorter wheelbase makes the weight more noticeable. You’ll adapt within a few drives, but expect slightly heavier steering and a bit more front-end dive during braking until you get used to the new weight distribution.
Wiring Your Winch: Battery Connections and Relay Setup
This is the section where most DIY installations go wrong. Take your time here—poor electrical connections cause 90% of winch failures.
Step 1: Route Power Cables
Start at the winch and work backward to the battery. Route the positive cable along the frame rail, avoiding heat sources and pinch points. Use cable ties or mounting clips every 12-18 inches to prevent cable movement. The negative cable can follow the same path or connect to a closer frame ground point.
For 4-door JKU owners: You’re running an extra 2-3 feet of cable compared to 2-door models. Budget for longer cable runs and additional mounting clips. Route along the driver’s side frame rail, following the factory wiring harness path when possible.
For 2007-2011 JK owners: You may need to drill through the firewall or modify existing grommets to route cables cleanly. Later model JKs (2012-2018) often have better-placed factory wire routing options. Check JK model year electrical differences for specific year compatibility notes.
Step 2: Install the Fuse Holder
This is non-negotiable: install an ANL fuse within 18 inches of the positive battery terminal. The fuse protects your entire electrical system if something shorts. Most 10,000 lb winches need a 150-175 amp fuse; check your winch manual for the exact specification.
I learned about proper fusing the hard way during a LED light bar install that went sideways. I used undersized connectors that couldn’t handle the current, and they melted into a smoking mess within minutes of operation. That experience taught me to respect electrical load ratings and always include proper circuit protection. Your winch draws 300-400 amps under load—far more than any other accessory on your Jeep. Proper fusing isn’t optional.
Step 3: Prepare Cable Ends
Strip 1/2” of insulation from each cable end. Use heavy-duty cable lugs designed for your wire gauge (2 AWG or 1/0 AWG). Crimp the lugs using a proper crimping tool—the hammer-style crimpers from auto parts stores don’t create reliable connections with heavy gauge wire. You need a hydraulic or ratcheting crimper.
After crimping, give each lug a solid pull test. If it slides off the wire, your crimp failed. Solder is optional but recommended for added insurance—apply heat-shrink tubing over the connection afterward.
Step 4: Connect to Battery
With the battery still disconnected, attach the positive cable to the positive terminal. Route through the fuse holder first. Tighten securely but don’t over-torque—you’ll strip the soft lead threads on battery terminals.
Connect the negative cable to the negative terminal or a dedicated frame ground point. If using a frame ground, remove paint and rust from a 2-3 inch area using a wire brush or sandpaper. Apply dielectric grease to prevent corrosion.
Step 5: Wire the Relay and Control Box
Most modern winches use a solenoid pack or relay box that controls direction and speed. This box typically mounts near the winch. Connect the small control wires from the winch to the solenoid pack following the wiring diagram in your manual.
A proper wiring diagram would show: Heavy gauge power cables running from the battery through a fuse to the solenoid pack, motor cables running from the solenoid pack to the winch motor, and small gauge control wires running from the solenoid pack to a handlebar-mounted remote control. The solenoid pack acts as the brain, using small control signals to switch heavy current flow to the motor.
Step 6: Install the Remote Control
Mount the remote control holder in an accessible location. Many JK owners mount it on the A-pillar grab handle or the center console. The remote should be easy to reach from outside the vehicle during recovery operations.
Apply dielectric grease to the remote control plug connection—this prevents corrosion from water intrusion during creek crossings and rainy recoveries.
Wire Gauge Reference:
- 8,000-9,000 lb winch: 2 AWG minimum
- 10,000-12,000 lb winch: 1/0 AWG recommended
- 12,000+ lb winch: 1/0 AWG or 2/0 AWG required
Critical Safety Warning: Never route power cables near the exhaust manifold or catalytic converter. Heat will degrade insulation and create a fire hazard. If you must cross near heat sources, use heat-resistant wire loom and secure the cables away from direct contact.
The secondary keyword ‘wiring winch jeep jk’ often brings people to this section, and for good reason—this is where mistakes cause the most problems. Take photos of each connection as you make it. If troubleshooting becomes necessary later, you’ll have a reference showing how everything should be connected.
Testing Your Installation and Safety Verification
With everything bolted down and wired up, it’s time to verify the installation works correctly—before you’re stuck in mud relying on it.
Step 1: Visual Inspection
Before reconnecting the battery, do a final walk-around:
- All mounting bolts tight and lock-tited
- No bare wire exposed or chafing against metal
- Fuse properly seated in holder
- All connections tight and protected with dielectric grease
- Cable routing secure with no loose sections
Step 2: Reconnect Battery and Check Voltage
Reconnect the negative battery terminal. Using your multimeter, measure voltage at the battery terminals (should read 12.5-13.0 volts with engine off). Now measure voltage at the winch motor terminals—you should see the same reading within 0.2 volts. Any voltage drop larger than that indicates high resistance somewhere in your wiring, possibly from a loose connection or undersized wire.
Step 3: Bench Test with Light Load
Start the engine to keep battery voltage up. Plug in the remote control and tap the “in” button briefly—less than one second. The winch should pull the cable in smoothly. Tap “out” to let some cable back out. Listen for unusual noises or grinding.
Step 4: Load Test
With the engine running, pull 15-20 feet of cable off the drum. Attach the cable to a tree using a tree saver strap and D-ring (never loop cable around a tree directly). Get back in the Jeep and measure voltage at the battery with the winch under load—you should see 13.5-14.5 volts with the engine running and minimal voltage drop.
Run the winch for 10-15 seconds, pulling the Jeep slightly toward the tree. Everything should operate smoothly without excessive heat buildup.
Step 5: Final Safety Checklist
Print or save this verification list:
- ☐ Winch mounting bolts torqued to spec
- ☐ Fuse within 18” of positive battery terminal
- ☐ All electrical connections tight and protected
- ☐ Cable routes secured away from heat and pinch points
- ☐ Voltage readings normal under load
- ☐ Winch operates in both directions smoothly
- ☐ Remote control properly mounted and accessible
- ☐ Cable condition inspected (no frays or kinks)
This is exactly the kind of testing I wish I’d done more thoroughly before my first real recovery situation. I installed everything, checked that it pulled cable in and out, and called it good. Then during an actual mud recovery, I discovered my negative ground connection wasn’t as solid as I thought—the winch stuttered under heavy load. Fortunately it still worked, but I re-did that ground connection the next day with proper frame preparation. Test thoroughly now, avoid problems later.
Spooling Your Synthetic Rope
The quality of your rope installation affects performance and safety. For optimal performance and longevity, consider the TYT Synthetic Winch Rope Kit - 1/4” x 50’, which includes protective sleeves and comes pre-tested for safety. When spooling synthetic rope, always maintain consistent tension to prevent loose loops and bunching that could jam during recovery.

TYT Synthetic Winch Rope Kit - 1/4'' x 50' with 10000 lbs Strength, Protective Sleeve, Heavy Duty Ho
$29.99
Check Price on Amazon →Never walk backward while someone else operates the winch and you’re guiding rope—if the rope breaks, you’re in its direct path. Always use gloves when handling rope, even synthetic varieties that are less harsh than steel cable. Spool rope in even layers with no crossing or bunching.
Premium Winch Options for Serious Enthusiasts
If you’re building a serious trail rig with extensive recovery capability, the VR EVO 12-S Electric Winch represents the premium end of the market. This 12,000 lb capacity winch includes synthetic rope, IP68 waterproofing for creek crossings, and superior motor performance for sustained pulling. It’s the choice for rock crawlers and extreme trail enthusiasts who demand maximum capability.

VR EVO 12-S Electric 12V Winch – 12,000 lb Pull Capacity, Synthetic Rope, IP68 Waterproof, High-Perf
$1044.24
Check Price on Amazon →Troubleshooting Common Installation Problems
Even with careful installation, issues can crop up. Here’s how to diagnose and fix the most common problems.
Winch Won’t Operate at All
Problem: You press the remote button and nothing happens.
Solution: Start with the basics. Check that the fuse isn’t blown (a blown fuse indicates a short somewhere—don’t just replace it without finding the cause). Verify battery connections are tight. Use your multimeter to check for 12+ volts at the winch motor terminals. If you have voltage but no operation, the winch motor or solenoid pack may be faulty.
Winch Works Intermittently
Problem: Sometimes the winch operates normally, other times it’s sluggish or won’t engage.
Solution: This usually indicates a loose or corroded connection. Remember my LED light bar story about melted connectors? The same principle applies here—connections degrade under high current loads. Remove and clean all cable connections. Look for discoloration or melted insulation. Use dielectric grease on reassembly. Check that battery terminals aren’t loose—these vibrate loose on JKs over time.
Winch Motor Runs Hot
Problem: The winch motor gets extremely hot during operation, or thermal overload protection shuts it down.
Solution: Measure voltage drop from battery to winch under load. You should see less than 0.5 volts difference. Higher voltage drop indicates resistance somewhere—typically from undersized wire or a poor connection. Verify you’re using at least 2 AWG cable, and that your crimps are solid.
Cable Won’t Spool Evenly
Problem: The cable bunches up on one side of the drum or creates loose loops.
Solution: This is operator error, not an installation problem. Always spool cable under light tension (use gloves, walk backward while someone runs the “in” button). The cable should layer evenly across the drum. If you need to re-spool, pull all cable off and start fresh with proper tension.
Solenoid Pack Clicks But Motor Doesn’t Run
Problem: You can hear the solenoids engaging but the motor doesn’t turn.
Solution: The control circuit works but the power circuit doesn’t. Check the heavy cables from the solenoid pack to the motor—these carry 300+ amps and need perfect connections. Remove, clean, and retighten. Verify the solenoid pack itself isn’t damaged (rare but possible).
Use Your Multimeter:
Voltage at battery: Should be 12.5-13V (engine off) or 13.5-14.5V (running) Voltage at winch terminals: Should match battery within 0.2-0.5V Resistance across cable run: Should be near zero ohms
If you’re chasing electrical issues and getting nowhere, refer back to JK electrical troubleshooting for model-specific quirks that might be contributing to your problems. The winch installation itself may be perfect, but underlying JK electrical gremlins can cause confusing symptoms.
Most Common Mistake: Undersized wire is the culprit in probably 60% of winch problems I’ve seen on forums and in person. Yes, 2 AWG cable costs more than 4 AWG. Yes, it’s harder to route through tight spaces. But it’s not optional. The secondary keyword ‘winch installation jeep jk’ brings many people to troubleshooting sections specifically because they tried to save money on wire gauge and regretted it.
Post-Installation Maintenance and Care
Your winch installation isn’t truly complete until you establish a maintenance schedule. A neglected winch won’t work when you need it most.
Monthly Maintenance (5 minutes):
- Visual inspection for loose cables or mounting bolts
- Check cable condition for frays, kinks, or rust
- Verify battery connections remain tight and corrosion-free
- Test winch operation briefly (5-10 seconds in each direction)
Quarterly Maintenance (15 minutes):
- Clean exposed metal surfaces with WD-40 or similar
- Apply fresh dielectric grease to electrical connections
- Check mounting bolt torque
- Inspect cable routing for any new rub points or wear
- Lubricate cable (synthetic rope) or drum bearings (check manual)
Annual Maintenance (30 minutes):
- Completely unspool cable, inspect full length
- Re-spool under proper tension with even layering
- Test under actual load (pull against a tree or another vehicle)
- Remove and clean all electrical connections thoroughly
- Check solenoid pack operation and mounting
When I started wrenching on my own JK with zero mechanical experience, I made every rookie mistake in the book—overtightened drain plugs, forgot to refill fluids, you name it. The habit that saved me was keeping a repair journal. I write down every maintenance task with the date and odometer reading. For the winch, I note when I last tested it, when I last re-spooled the cable, and any issues I encountered.
Synthetic Rope vs Steel Cable Maintenance:
If you have synthetic rope, never let it remain spooled when wet—it can develop mold and rot from the inside. Unspool after water crossings and let it dry. Inspect for UV damage if your Jeep sits outside.
If you have steel cable, apply light machine oil occasionally to prevent rust. Wear heavy gloves when handling—even new cable has burrs that’ll shred your hands. Replace the cable when you see broken strands (even one or two).
Keep Your Recovery Gear Ready:
Your winch is only as useful as the recovery gear you carry. Maintain a recovery kit that includes:
- Tree saver strap
- Two D-ring shackles
- Recovery gloves
- Winch damper (for cable safety)
- Snatch block for double-line pulls
Check this gear every few months. Straps degrade from UV exposure. Shackles rust. Have functional gear ready when you need it.
Frequently Asked Questions
How long does it take to install a winch on a Jeep JK?
First-time installers should budget 3-5 hours for a complete winch installation. This includes mounting the winch, running cables properly, making secure electrical connections, and testing thoroughly. If you’re also installing a new winch bumper, add another 2-3 hours for bumper installation. Experienced installers can complete a winch-only install in 90-120 minutes, but don’t rush your first installation—electrical mistakes create safety hazards.
What size winch do I need for a Jeep JK?
Choose a winch rated for 1.5 times your JK’s weight. A 2-door JK Sport weighs around 3,800 lbs, so an 8,000 lb winch provides adequate pulling power. A loaded 4-door Rubicon can exceed 4,500 lbs—go with a 9,000-10,000 lb winch for comfortable safety margin. Heavier winches handle steep angles and mud better but cost more and consume more electrical power. Check Rubicon vs Sport weight differences for specific trim weights.
Can I install a winch without a winch bumper?
Not safely. Factory JK bumpers and most non-winch aftermarket bumpers lack the mounting provisions and structural strength for recovery loads. A 10,000 lb winch under full load exerts tremendous force—cheap bumpers will bend, crack, or tear mounting bolts from the frame. Invest in a winch-rated bumper from a reputable manufacturer like Warn, Smittybilt, or ARB. The bumper should have a 3/16” or thicker mounting plate specifically designed for winch attachment.
Do I need a special battery for a winch?
Your stock battery usually works fine for occasional winch use, but it will drain quickly during extended pulls. A winch can draw 300-400 amps—that’ll run down a battery in 2-3 minutes without the engine running. Always run the engine during winch operation to keep battery voltage up. If you do frequent recoveries, consider upgrading to a dual-battery system or an AGM battery with higher cold cranking amps. The secondary keyword ‘diy winch install wrangler’ often leads people to battery questions—your charging system matters as much as the battery itself.
Synthetic rope vs steel cable—which is better?
Synthetic rope is safer (won’t whip dangerously if it breaks), lighter, easier to handle, and doesn’t store as much energy under tension. Steel cable is more durable against rocks and abrasion, less expensive, and more UV-resistant. For JK trail use, most owners prefer synthetic rope due to the safety benefits—it’s easier to handle during recoveries and won’t cut your hands like steel cable. Budget for replacement every 3-5 years depending on UV exposure and use frequency. Compare JK vs JL specifications if you’re shopping for a newer model—JL owners have the same rope vs cable decision.
Will a winch drain my battery when not in use?
A properly installed winch draws virtually no power when not in use—maybe a few milliamps at most. If your battery drains with the winch installed, you have a wiring problem: either a short circuit somewhere, or the solenoid pack is staying partially energized (rare but possible). Use your multimeter to measure current draw with the ignition off—it should be under 50 milliamps total (including normal vehicle draws like the alarm system). Higher draw indicates an electrical fault that needs diagnosis.
Final Thoughts: Your Winch Installation Checklist
You’ve got all the information you need to install a winch correctly. Here’s your final go/no-go checklist before calling it complete:
Critical Installation Points:
- ☐ Winch mounted securely with Grade 8 bolts, torqued to spec, with thread locker applied
- ☐ Wire gauge matches or exceeds winch requirements (2 AWG minimum for most applications)
- ☐ Fuse installed within 18 inches of positive battery terminal
- ☐ All cable connections crimped properly, with dielectric grease applied
- ☐ Cable routing secured away from heat sources and pinch points
- ☐ Test completed successfully under load with normal voltage readings
- ☐ Maintenance schedule established and documented
Installing a winch on your JK transforms how you approach trail obstacles. What used to be turn-around situations become manageable challenges. But that confidence only comes from knowing your installation is solid. Take the time to do it right—proper wire gauge, secure mounting, thorough testing.
Ready to explore more capability-building modifications for your JK? Check out the comprehensive JK modification guide for a roadmap to building the perfect trail rig. And if you’re considering other JK upgrades, start with the fundamentals: armor, recovery gear, and suspension before chasing horsepower.
Now get out there and use that winch. Just remember: how to install a winch on jeep jk is just the beginning—learning to use it safely and effectively takes practice. Start with simple recoveries in safe environments before attempting anything heroic.
Get the Free JK Build Planner
Complete PDF with mod checklists, gear ratios, tire sizing charts, and budget worksheets. Everything you need to plan your JK build.
No spam. Unsubscribe anytime. By subscribing, you agree to our Privacy Policy.
Jeep JK Guide
We're JK owners who've been building, breaking, and fixing Wranglers for years. Everything here is tested on our own rigs - no sponsored fluff, just honest recommendations.
Learn more about us →Get the JK Build Planner
Free PDF with complete build checklists, gear ratios, and tire fitment guides.
By subscribing, you agree to our Privacy Policy.
Related Articles

Best Soft Top for Jeep JK Unlimited: Top 8 4-Door Options
Best soft tops for Jeep Wrangler JK Unlimited 4-door reviewed: premium Sailcloth, budget vinyl, Sunrider flip-back, and quick-removal options for 2007-2018 JKU models.

Best Soft Top for Jeep Wrangler JK 2 Door: 7 Premium Options
Compare the 7 best soft tops for 2-door Jeep Wrangler JK. Premium Sunbrella, budget picks, and OEM alternatives tested. Find your perfect replacement top.
Best Recovery Winch for Jeep JK: Heavy-Duty Off-Road Recovery Options