JK Electrical Upgrades Guide: Lighting, Power & Accessories

The JK’s electrical system is surprisingly capable from the factory, but the moment you start adding a winch, lights, a fridge, or any serious accessories, you’ll quickly discover its limits. The good news: upgrading your JK’s electrical system is straightforward if you understand what you’re working with.
This guide covers everything from simple LED headlight swaps to full dual-battery setups with auxiliary fuse boxes. Whether you’re adding your first light bar or wiring an overland rig, you’ll find what you need here.
JK Electrical System Basics
Before you start adding loads, you need to understand what you’re working with.
Battery Specifications
| Model Year | Stock Battery | Cold Cranking Amps | Reserve Capacity |
|---|---|---|---|
| 2007-2011 | Group 48 | 550 CCA | 90 min |
| 2012-2018 | Group 48 | 600 CCA | 100 min |
| Rubicon (all) | Group 48 | 600-700 CCA | 100 min |
The stock battery location is under the hood on the passenger side. Space is tight, but there’s room for larger group sizes with minor modifications.
Alternator Output
| Configuration | Alternator Rating | Actual Output at Idle |
|---|---|---|
| 3.8L V6 (2007-2011) | 140 amp | ~80-90 amps |
| 3.6L V6 (2012-2018) | 160 amp | ~95-110 amps |
| Heavy-duty option | 180 amp | ~110-120 amps |
Important: Alternator ratings are maximum output at high RPM. At idle, you’re getting 60-70% of rated capacity. This matters when running a winch or other high-draw accessories.
Stock Electrical Capacity
Your JK’s factory electrical system draws approximately 50-60 amps for normal operation (ignition, fuel pump, ECU, lights, HVAC). That leaves roughly 80-100 amps available for accessories when the engine is running at normal RPM.
Lighting Upgrades
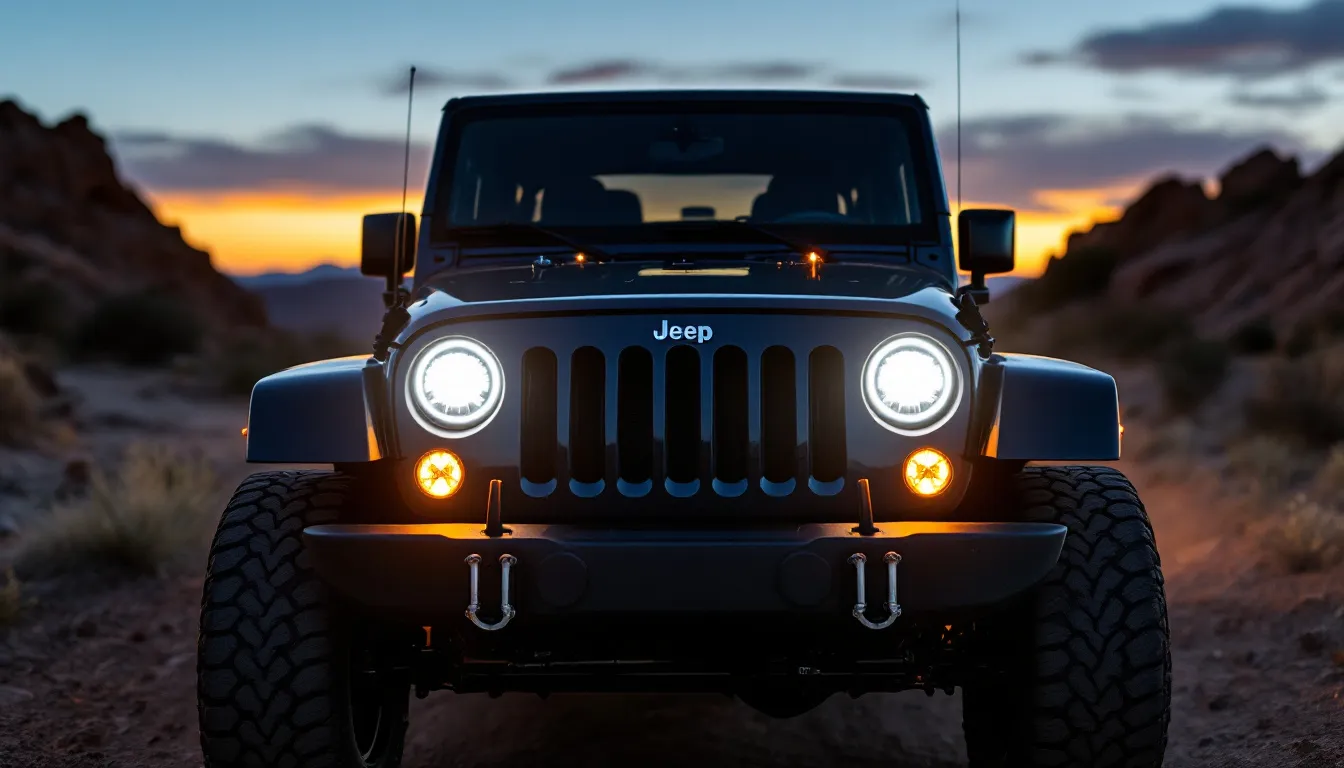
Lighting is usually the first electrical modification JK owners make - and for good reason. The stock halogen headlights are dim by modern standards.
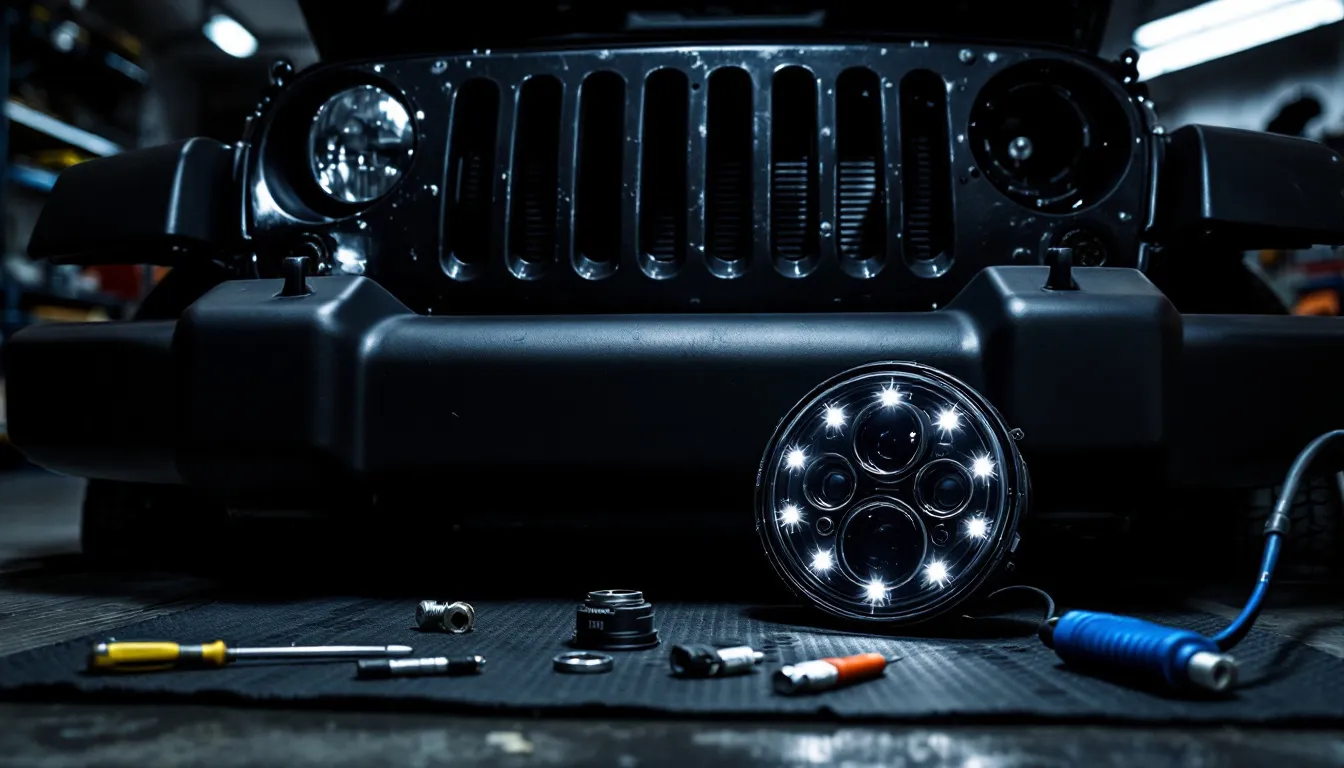
Headlight Upgrades
The JK uses standard 7-inch round headlights, giving you plenty of options.
| Type | Output | Lifespan | Price Range |
|---|---|---|---|
| Stock Halogen | 700-1000 lumens | 500-1000 hours | $30-60/pair |
| LED Replacement | 3000-6000 lumens | 30,000+ hours | $150-500/pair |
| HID Conversion | 3000-4500 lumens | 2000-3000 hours | $80-200/pair |
Our recommendation: Skip HID conversions. They require ballasts, generate more heat, and often have poor beam patterns in the JK’s reflector housing. Quality LED headlights are direct replacements that plug right in.
LED Headlight Considerations
Not all LED headlights are created equal. Cheap Amazon LEDs often have terrible beam patterns that blind oncoming traffic while providing poor road illumination.
What to look for:
- DOT/SAE certification (legal for road use)
- Proper low-beam cutoff pattern
- Integrated thermal management (heat sinks or fans)
- Reputable brand with warranty
Quality brands: JW Speaker, Truck-Lite, KC HiLiTES, Morimoto. For our full roundup, see Best LED Headlights for JK.
Our editor’s pick: The JW Speaker 8700 Evolution J2 is the gold standard for JK headlights. They’re what Jeep themselves spec’d for the JL Wrangler, which tells you everything about the beam quality. The low beam has a razor-sharp cutoff that won’t blind oncoming traffic, and the high beam throws light further than any other 7-inch LED we’ve tested. They’re not cheap, but we’ve seen sets last 8+ years on daily-driven JKs without a single failure.
Fog Light Upgrades
Stock JK fog lights are equally underwhelming. Replacement options follow the same pattern as headlights.
| Upgrade | Power Draw | Notes |
|---|---|---|
| LED fog replacement | 15-30W each | Direct plug-and-play |
| Auxiliary LED pods | 20-50W each | Requires additional wiring |
| Amber LED pods | 20-50W each | Better in dust/fog |
Pro tip: Consider amber fog lights. They cut through dust, fog, and rain better than white lights and reduce eye strain during night driving. Great for mud terrain and dusty trail conditions.
The Diode Dynamics SS3 is the fog light upgrade we’d choose if we could only pick one. They’re a true plug-and-play replacement that fits right into your factory fog light pockets — no drilling, no adapter brackets, no rewiring. The yellow/amber SAE version is our favorite because it genuinely improves visibility in rain and dust rather than just looking bright. These are also one of the few aftermarket fog lights that are truly SAE/DOT compliant, so you won’t have issues at inspection.

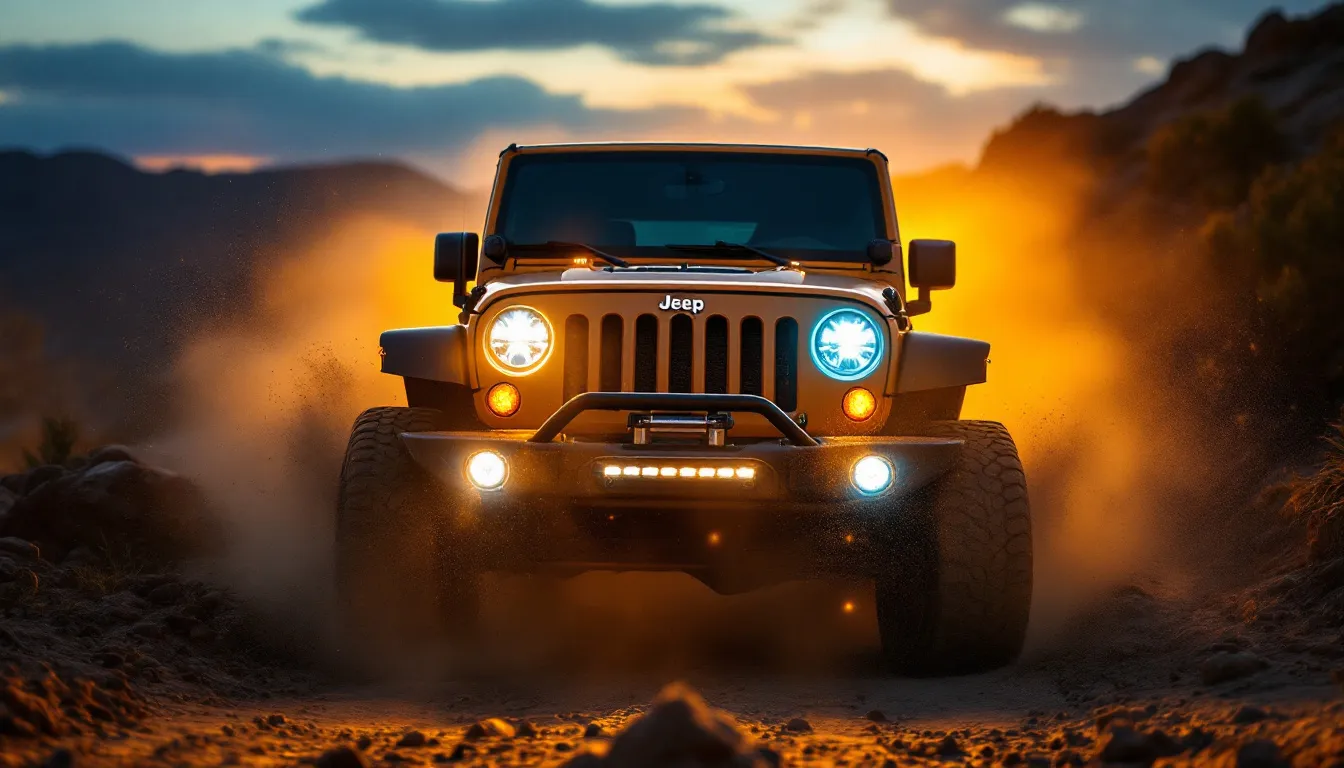
Light Bars and Auxiliary Lighting
This is where electrical planning becomes important. Light bars can draw serious power.
| Light Bar Size | Typical Wattage | Current Draw |
|---|---|---|
| 20” single row | 100-120W | 8-10 amps |
| 30” single row | 150-180W | 12-15 amps |
| 40” single row | 200-240W | 17-20 amps |
| 50” dual row | 300-400W | 25-33 amps |
Wiring requirements: Any light over 55W should be wired with a relay, fuse, and appropriately sized wire - not tapped into existing circuits. See our Best JK Light Bars and Best JK LED Pod Lights guides for specific product recommendations.
If you’re going to invest in a light bar, the Rigid E-Series PRO is the benchmark everything else is measured against. Yes, there are cheaper options — lots of them — but the E-Series has proven optics that put light where you need it without excessive scatter, and Rigid’s build quality means you won’t be replacing it in two years. The 20-inch spot/flood combo is the ideal size for a JK hood or bumper mount: bright enough to transform night driving without the wind noise and weight of a 50-inch bar.

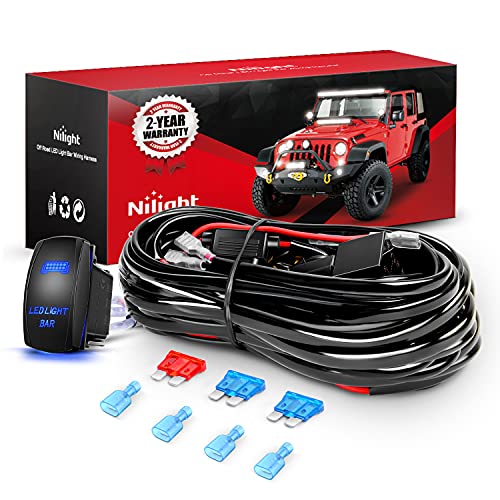
Whatever light bar you choose, you’ll need a proper wiring harness. The Nilight 2-lead harness is the one we recommend for most installs — it comes with a relay, fuse, rocker switch, and enough wire for two lights. At under $15, there’s no reason to cobble together your own harness from parts. It’s 16 AWG, which handles light bars up to about 180W per lead. For anything bigger, step up to a 14 or 12 AWG kit.
Rock Lights
Rock lights are low-draw accessories that illuminate the ground beneath your Jeep for night wheeling.
| Type | Power per light | Full set (8 lights) |
|---|---|---|
| Halogen | 20W | 13+ amps |
| LED | 3-9W | 2-6 amps |
LED rock lights are the only sensible choice. A full set of 8 quality LED rock lights draws less than a single halogen bulb. Rock lights pair well with armor and are essential for night wheeling on technical trails.
The SUNPIE 8-pod RGB set is a JK community favorite and it’s easy to see why. You get 8 pods with Bluetooth app control, music sync mode, and millions of color options — all for well under $100. They’re IP67 waterproof, draw next to nothing electrically, and the adhesive mounting pads mean you can install the full set in about an hour without drilling. Are they the absolute brightest rock lights money can buy? No. But for the price-to-fun ratio, nothing else comes close.

Power System Upgrades
Once you’ve added a winch, fridge, lights, and other accessories, you’ll likely need to upgrade your power foundation.
Battery Upgrades
The simplest power upgrade is a better battery.
| Battery Type | Pros | Cons | Price |
|---|---|---|---|
| Lead Acid (stock) | Cheap, widely available | Short cycle life, heavy | $100-150 |
| AGM | Maintenance-free, vibration resistant | Heavier, more expensive | $200-350 |
| Lithium (LiFePO4) | Lightweight, deep discharge capable | Expensive, cold-weather limitations | $800-1500 |
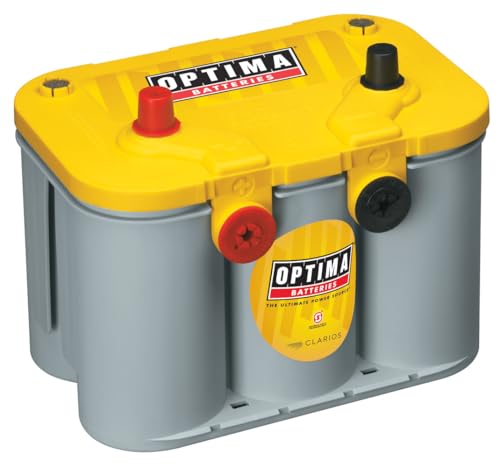
Best value: A quality AGM battery like the Optima YellowTop or Odyssey PC1500. They handle deep discharges better than stock batteries and tolerate the JK’s engine bay heat.
The Optima YellowTop is arguably the most popular battery upgrade in the JK community — and for good reason. The D34/78 dual-post design fits the JK battery tray perfectly, and the spiral-cell AGM construction handles vibration better than flat-plate batteries (important for off-road use). At 750 CCA with 120 minutes of reserve capacity, it’s a meaningful step up from stock. The real advantage is deep-cycle capability: you can run accessories with the engine off without destroying the battery the way you would with a standard lead-acid.
Alternator Upgrades
If you’re consistently drawing more than your alternator can provide, it’s time to upgrade.
| Upgrade | Output | Cost | Notes |
|---|---|---|---|
| OEM HD alternator | 180 amp | $200-300 | Easy swap, stock appearance |
| High-output aftermarket | 200-250 amp | $350-500 | May require bracket mods |
| Dual alternator | 300+ amp | $800-1200 | Serious builds only |
When you need an alternator upgrade:
- Running a winch frequently
- Multiple high-draw accessories (fridge, inverter, lights)
- Electrical system voltage drops below 13.5V with accessories on
Dual Battery Systems
A dual battery setup provides backup power for winching and reserve capacity for running accessories with the engine off.
Dual Battery Components
| Component | Purpose | Cost |
|---|---|---|
| Second battery | Reserve power | $200-350 |
| Battery isolator/separator | Prevents both batteries from draining | $100-300 |
| Battery tray | Mounts second battery | $50-150 |
| Wiring kit | Connects the system | $50-100 |
Isolator Types
| Type | How It Works | Best For |
|---|---|---|
| Solenoid-based | Relay connects batteries when running | Simple, budget builds |
| VSR (Voltage Sensitive Relay) | Auto-connects at charging voltage | Most JK builds |
| DC-DC Charger | Actively manages charging | Lithium batteries, heavy accessory use |
Installation locations: The most common second battery location is under the hood where the factory air box sits (after relocating the air intake). Some owners mount it in the rear cargo area or replace the rear seat. For a complete walkthrough, see our JK Dual Battery Setup guide.
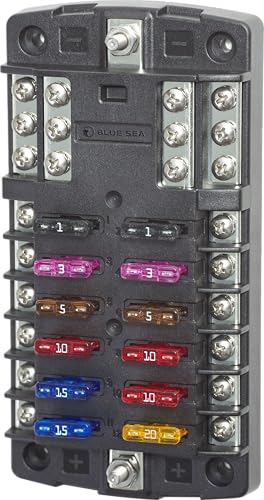
The heart of any dual battery system is the isolator, and the Blue Sea ML-ACR is the one most JK builders trust. It’s a 500-amp magnetic latching relay that automatically combines your batteries when the alternator is charging and isolates them when you shut the engine off — so you can run your fridge or camp lights all night without killing your starting battery. The “ML” (magnetic latching) design draws almost zero current itself (under 40mA), and it includes a manual override switch for emergency parallel starting if your main battery dies on the trail. It’s the same unit that marine builders use on boats, which says a lot about its reliability.

Winch Electrical Requirements
A winch is one of the highest electrical draws you’ll add to your JK. Proper wiring is critical — and you’ll need a proper steel bumper to mount it.
Winch Power Requirements
| Winch Rating | Peak Draw | Recommended Wire | Minimum Battery |
|---|---|---|---|
| 8,000 lbs | 400 amps | 2 AWG | 650 CCA |
| 9,500 lbs | 450 amps | 1/0 AWG | 700 CCA |
| 10,000 lbs | 480 amps | 1/0 AWG | 750 CCA |
| 12,000 lbs | 500+ amps | 1/0 AWG | 800 CCA |
The 9,500 lb sweet spot: For most JK builds, a 9,500 lb winch provides plenty of pulling power without overwhelming the electrical system. The stock JK alternator and a quality AGM battery can handle it with proper wiring.
Winch Wiring Best Practices
-
Wire gauge matters: Use the wire gauge specified by the winch manufacturer - or go larger. Never smaller.
-
Short runs are better: Mount the solenoid box close to the battery. Every foot of wire adds resistance.
-
Ground is critical: The ground path must be as robust as the positive. Clean metal-to-metal contact, no paint.
-
Fuse appropriately: Install an ANL fuse rated for your winch’s maximum draw near the battery.
-
Run the engine: Always run the engine while winching. A dead battery in a recovery situation is dangerous.
For our complete winch comparison, see Best Winches for JK. Need a bumper to mount it? Check our Best JK Front Bumpers guide, or follow our step-by-step JK Winch Installation Guide.
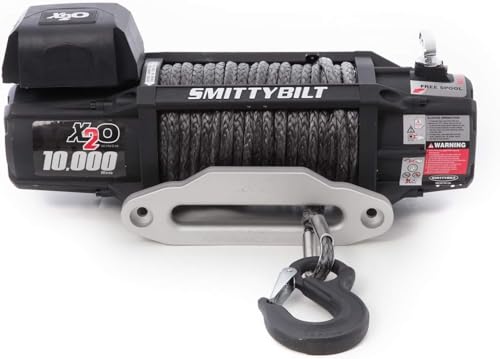
If you’re looking for a solid mid-range winch that won’t require electrical upgrades, the Smittybilt X2O 10K is hard to beat at its price point. It pulls 10,000 lbs (right in the JK sweet spot), comes with synthetic rope instead of steel cable (lighter, safer, and won’t kink), and the IP67 waterproof rating means you don’t have to worry about creek crossings. The wireless remote is a nice touch for solo recovery situations where you need to operate the winch from inside the vehicle.
Auxiliary Power Distribution
Once you have multiple accessories, you need a clean way to power and protect them.
Auxiliary Fuse Boxes
An auxiliary fuse box gives you a central location for accessory circuits with individual fuse protection.
| Type | Circuits | Features | Price |
|---|---|---|---|
| Basic fuse block | 4-6 | Fuse protection only | $20-50 |
| Relay/fuse box | 6-12 | Integrated relays + fuses | $100-200 |
| Switch panel systems | 4-8 | Switches, relays, fuses integrated | $200-500 |
Where to mount: The most common location is inside the engine bay on the driver’s side fender well, or inside the cab behind the dash. For dedicated switch panel options, see our Best JK Aux Switches guide.
For JK owners who want the cleanest possible installation, the sPOD BantamX is the ultimate all-in-one solution. It replaces your entire relay/fuse/switch setup with a single controller that mounts under the hood and connects to a compact touchscreen switch panel inside the cab. Eight individually programmable circuits, Bluetooth control from your phone, and it mounts in the factory location with JK-specific brackets. It’s a premium investment, but if you’re running more than 3-4 accessories, the wiring simplification alone is worth it.

If you don’t need the fancy switch panel and just want a reliable way to distribute power to your accessories, the Blue Sea Systems fuse block is the marine-industry standard. It’s what boat builders use, which means it’s built to handle vibration, moisture, and corrosion — exactly what your JK’s engine bay throws at it. Twelve circuits with a common bus, negative bus bar included, and it accepts standard ATO/ATC blade fuses you can buy at any auto parts store. At under $60, this is the best bang-for-buck electrical upgrade you can make.
Power Distribution Recommendations
| Accessory | Wire Gauge | Fuse Size |
|---|---|---|
| LED headlights | 14 AWG | 15 amp |
| Light bar (under 200W) | 12 AWG | 20 amp |
| Light bar (over 200W) | 10 AWG | 30 amp |
| Rock lights | 16 AWG | 10 amp |
| Compressor | 10 AWG | 30 amp |
| Fridge | 12 AWG | 15 amp |
| Winch control circuit | 14 AWG | 10 amp |
Auxiliary Power Outlets
Adding 12V outlets or USB ports is simple but often done poorly.
Do this:
- Run dedicated circuits for high-draw devices
- Use properly rated outlets (many cheap outlets are only rated for 5 amps)
- Install inline fuses close to the power source
Don’t do this:
- Tap into cigarette lighter circuits for high-draw devices
- Daisy-chain multiple devices off one circuit
- Use vampire taps on factory wiring
Common Electrical Mistakes
Learn from others’ expensive lessons.
Mistake #1: Undersized Wiring
Using wire that’s too small creates voltage drop and heat. At best, your accessories underperform. At worst, you melt wiring and start a fire.
Fix: Always use the manufacturer’s recommended wire gauge or larger. When in doubt, go up a size.
Mistake #2: Poor Ground Connections
Half of all electrical problems are ground issues. Paint, rust, and corrosion create resistance.
Fix: Sand or grind paint off grounding points. Use star washers. Apply dielectric grease. Create redundant ground paths for critical systems.
Mistake #3: Tapping Factory Circuits
Adding accessories by tapping into existing factory wiring overloads circuits and creates diagnostic nightmares.
Fix: Run dedicated circuits from the battery through your own fuse box.
Mistake #4: Skipping Relays
Running high-current accessories through dash switches or factory wiring burns contacts and melts plastic.
Fix: Use relays for anything over 5 amps. The switch controls the relay, the relay controls the load.
Mistake #5: No Circuit Protection
Running unfused wires is asking for an electrical fire.
Fix: Every circuit needs a fuse, sized appropriately for the wire and load. Install fuses within 12 inches of the power source.
Mistake #6: Using the Wrong Connectors
Crimp connectors from the hardware store are often garbage. They corrode, they fall off, they create resistance.
Fix: Use marine-grade heat-shrink connectors or solder connections. Protect with heat shrink and dielectric grease. Keep quality tools on hand — see our JK Trail Tool Kit for essentials.
Wiring Best Practices
Wire Sizing Reference
| Continuous Amps | Under 10 ft | 10-20 ft | Over 20 ft |
|---|---|---|---|
| 5 amp | 18 AWG | 16 AWG | 14 AWG |
| 10 amp | 16 AWG | 14 AWG | 12 AWG |
| 15 amp | 14 AWG | 12 AWG | 10 AWG |
| 20 amp | 12 AWG | 10 AWG | 8 AWG |
| 30 amp | 10 AWG | 8 AWG | 6 AWG |
Essential Wiring Supplies
| Item | Purpose |
|---|---|
| Split loom | Protects wires from abrasion |
| Heat shrink | Seals connections |
| Dielectric grease | Prevents corrosion |
| Zip ties | Secures wiring runs |
| Adhesive-lined terminals | Marine-grade connections |
| Wire labels | Future troubleshooting |
If you’re doing any amount of wiring, do yourself a favor and grab a marine-grade heat shrink connector kit before you start. This 270-piece assortment gives you every connector type you’ll need — ring, spade, butt splice, and fork terminals — all with adhesive-lined heat shrink that seals out moisture when heated. The difference between these and the cheap vinyl connectors from the auto parts store is night and day: these won’t corrode, vibrate loose, or fall apart after a season of trail use. Keep the kit in your toolbox and you’ll reach for it constantly.

Running Wires Through the Firewall
The JK has two common firewall pass-through points:
- Factory grommet (driver’s side, near brake booster): Remove the center plug and run wires through
- Aftermarket bulkhead connectors: Drill your own hole with a weatherproof bulkhead fitting
Always seal penetrations with silicone or a proper grommet. Water intrusion causes corrosion and electrical gremlins.
Cost Breakdown by Upgrade Type
Lighting Upgrades
| Upgrade | DIY Cost | Professional Install |
|---|---|---|
| LED headlights | $150-500 | +$50-100 |
| LED fog lights | $100-200 | +$50 |
| 20” light bar (installed) | $150-400 | +$100-200 |
| Rock light kit (8 lights) | $100-300 | +$150-250 |
Power System Upgrades
| Upgrade | DIY Cost | Professional Install |
|---|---|---|
| AGM battery upgrade | $200-350 | +$50 |
| High-output alternator | $350-500 | +$150-250 |
| Basic dual battery kit | $400-700 | +$300-500 |
| Complete dual battery with DC-DC | $800-1200 | +$400-600 |
Winch Installation
| Component | Cost |
|---|---|
| Winch (9,500 lb) | $400-800 |
| Bumper with winch mount | $600-1500 |
| Wiring kit | $50-100 |
| Professional install (wiring only) | $150-300 |
Auxiliary Systems
| Upgrade | DIY Cost | Professional Install |
|---|---|---|
| Auxiliary fuse box | $50-200 | +$200-400 |
| Switch panel system | $200-500 | +$300-500 |
| Full accessory wiring (lights, compressor, etc.) | $300-600 in parts | +$500-1000 |
Planning Your Electrical Build
Start with a clear plan before buying anything.
Step 1: List Your Accessories
Write down everything you want to run, both now and in the future. Include power draw for each item.
Step 2: Calculate Total Draw
Add up the maximum simultaneous draw. This tells you if your charging system can keep up.
Step 3: Plan Your Circuits
Group accessories logically and plan dedicated circuits for high-draw items.
Step 4: Design Before You Buy
Sketch your wiring layout. Identify fuse locations, wire runs, and mounting points. This prevents expensive mistakes.
Step 5: Build with Future Expansion in Mind
Install a fuse box with extra circuits. Run larger wire than you need today. Leave room for growth.
Detailed Electrical Guides
- Best LED Headlights for JK - LED headlight upgrade options and comparisons
- Best JK Light Bars - Auxiliary lighting options and mounting
- Best JK LED Pod Lights - Compact auxiliary lights for bumpers and A-pillars
- Best JK Aux Switches - Switch panel systems for clean accessory control
- JK Dual Battery Setup - Complete dual battery configuration guide
- Best Winches for JK - Winch options with proper wiring specs
- JK Winch Installation Guide - Step-by-step winch install and wiring
- JK Onboard Air Compressor - Onboard air system setup and wiring
- Best JK CB Radio - Trail communication setup
- Best JK Backup Camera - Rearview camera wiring and install
Related Articles
- JK Armor & Protection Guide - Bumpers include light mounts and winch provisions
- Best JK Front Bumpers - Bumper options with winch mounts and light tabs
- Best JK Portable Fridge - Fridges that need dedicated electrical circuits
- Best JK Lift Kits - Consider electrical routing when lifting
- JK Common Problems by Year - Known electrical issues to watch for
- Best JK Phone Mount - Phone mounting and charging solutions
- Best Portable Air Compressor JK - Portable option if you skip onboard air
- JK Spring Trail Prep Checklist - Electrical system checks before trail season
Frequently Asked Questions
Can I install LED headlights on my JK without modifications?
Yes, JK LED headlights are direct bolt-in replacements for the stock 7-inch round sealed beam units. The mounting ring and H13 connector are the same. No wiring changes needed - just plug and play. However, quality matters greatly for proper beam pattern and avoiding blinding oncoming traffic. Stick with DOT-approved units from reputable brands like JW Speaker, Truck-Lite, or Morimoto.
Do I need a dual battery setup?
Only if you’re running high-draw accessories (winch, fridge, camp lights) while the engine is off, or if you need absolute winch reliability in remote areas. A dual battery system adds weight, complexity, and cost. Most daily drivers and weekend warriors do fine with a quality single AGM battery upgrade. Consider your actual use case before committing to dual batteries.
How big of a winch can my stock electrical system handle?
The JK stock 140-160 amp alternator can support winches up to 12,000 lbs with proper wiring. A 9,500 lb winch is the sweet spot for most JKs - enough pulling power for self-recovery and trail assists without maxing out the electrical system. If you’re running lots of accessories alongside the winch, consider an alternator upgrade.
What wire gauge do I need for a light bar?
For light bars under 200W, 12 AWG wire is sufficient for runs under 15 feet. For larger light bars (200-400W), use 10 AWG wire. Always account for total wire length (positive AND negative runs combined) when sizing. Include a relay and appropriate fuse in every light bar installation.
How do I add accessories without overloading my electrical system?
Install an auxiliary fuse box with its own connection to the battery. This keeps your accessory circuits separate from factory wiring, provides proper fuse protection, and makes troubleshooting easier. Run the main feed wire from the battery with an appropriately sized fuse, then distribute to individual circuits from the aux fuse box.
Should I upgrade my alternator when adding a winch?
Not necessarily. The stock 160 amp alternator handles occasional winch use fine if you run the engine at 1500+ RPM while winching. Upgrade if you’re doing frequent recoveries, running a 12,000 lb+ winch, or have extensive other accessories. A high-output 200+ amp alternator provides more headroom for the entire system.
Get the Free JK Build Planner
Complete PDF with mod checklists, gear ratios, tire sizing charts, and budget worksheets. Everything you need to plan your JK build.
No spam. Unsubscribe anytime. By subscribing, you agree to our Privacy Policy.
Frequently Asked Questions
Can I install LED headlights on my JK without modifications?
Yes, JK LED headlights are direct bolt-in replacements for the stock 7-inch round sealed beam units. No wiring changes needed - just plug and play. However, quality matters greatly for proper beam pattern and avoiding blinding oncoming traffic.
Do I need a dual battery setup?
Only if you're running high-draw accessories (winch, fridge, camp lights) while the engine is off, or if you need winch reliability in remote areas. Most daily drivers and weekend warriors do fine with a quality single AGM battery upgrade.
How big of a winch can my stock electrical system handle?
The JK stock 140-160 amp alternator can support winches up to 12,000 lbs with proper wiring. A 9,500 lb winch is the sweet spot for most JKs. If you're running lots of accessories, consider an alternator upgrade.
What electrical upgrades should I do first on my JK?
Start with LED headlights (safety and visibility), then add an auxiliary switch panel (sPOD or Trigger Controller) to properly wire future accessories. A dual battery setup comes next if you plan to run a winch, fridge, or extensive lighting. This foundation supports all future electrical additions without overloading the stock system.
Can the stock JK alternator handle a winch and light bar?
The stock 140-160 amp alternator handles a winch and single light bar fine since they rarely run simultaneously at full draw. However, if you're running a winch, multiple light bars, a fridge, CB radio, and air compressor, upgrade to a 200+ amp alternator or add a dual battery isolator to prevent voltage drops.
Jeep JK Guide
We're JK owners who've been building, breaking, and fixing Wranglers for years. Everything here is tested on our own rigs - no sponsored fluff, just honest recommendations.
Learn more about us →Get the JK Build Planner
Free PDF with complete build checklists, gear ratios, and tire fitment guides.
By subscribing, you agree to our Privacy Policy.
Related Articles
Best LED Halo Headlights for Jeep Wrangler JK: Top 7 Picks
The best LED halo headlights for Jeep Wrangler JK balance brightness, DOT approval, and budget. Compare 7 top picks from $60-$600 with installation tips.
How to Install LED Headlights on Jeep Wrangler JK: Complete Step-by-Step Guide
Learn how to install LED headlights on your Jeep Wrangler JK with this step-by-step guide. DOT-approved options, aiming tips, and flicker fixes included.
Best LED Fog Lights for Jeep JK: Brightest Off-Road Vision